Adding or Editing Site Pages
-
Open a Site Page
- Add a Site Page
- Delete a Site Page
- Edit an Existing Site Page
Add a Site Page to Top Navigation Bar
- Rename a Site Page
- Resetting a Page to the Site Definition Version
Add a Promoted Links List to your Page
- Create a Promoted Links List
Adding or Editing Site Pages
Open a Site Page
- In your web browser, open your SharePoint site.
- Navigate to the site you want to open a page.
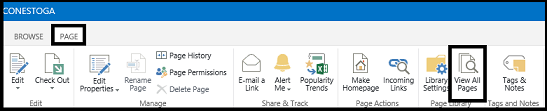
- Click the Page tab.
- Click the View All Pages button. (You can also click Site Contents on the Quick Launch bar and then click the Site Pages tile)
- Click the page link to open it.
You can also click the More Options button (. . .) next to the page to display additional options.
Add a Site Page
- In your web browser, open your SharePoint site.
- Navigate to the site where you want to add a page.
- Click the Settings button (Gear icon) on the Navigation bar, and then click Add a page.
- Enter a page name. (The direct address to the page appears below the name box).
- Click
Create. (A new page appears with a blank area to create a layout and add content

- Click the Format Text tab.
- Click the Text Layout button, and then click a layout option.
- Add text to the layout, and then use options (Font, Paragraph, and Styles) on the Format Text tab to format the text.
- Click the Insert tab, and then use buttons to insert a table, picture, video, and audio, links, app or web parts, or embed code.
- When you're done, click the Save button on the Navigation bar or Format Text tab.
Delete a Site Page
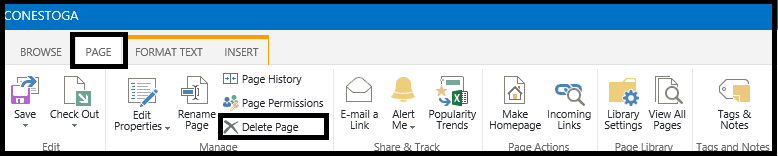
- Click the Page tab.
- Click the
Delete Page button.
- click OK to confirm the deletion.
TIMESAVER Select the page file, click the Files tab and then click the Delete Document button.
Edit an Existing Site Page
- Click the page link to open it.
- Click the Edit button on the Navigation bar or Page tab.
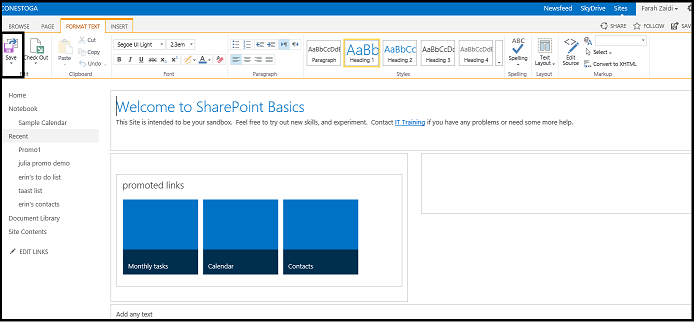
- Click the Format Text tab.
- Select the element you want to modify.
- Use formatting options (Font, Paragraph, and Styles) on the Format Text tab to format the text.
- Use buttons on the Insert tab to insert a table, picture, video, and audio, links, app or web parts, or embed code.
- When you're done, click the Save button on the Navigation bar or Format Text tab.
You can also click Settings button (Gear icon), and then click Edit page.
TIMESAVER Select the page file, click the Files tab, and then click the Edit button.
Add a Site Page to Top Navigation Bar
You can add a site page to the Top Link or Quick Launch bar for easy access.
- Navigate to the site page,
- Click the Edit Link button
- Drag the page item or header to the Top Link or Quick Launch bar
- Click Save.
Rename a Site Page
You can rename a site page.
- Navigate to the site page
- Click the Page tab
- Click the Rename Page button
- Enter a new page Name
- Then Save now.
Resetting a Page to the Site Definition Version
If you want to remove all customizations from a page, such as changes to Web Part zones or text added to the page, you can use the Reset to site definition link in Site Settings, which you can access from the Settings button (Gear icon) on the Navigation bar. You can select an option to reset a specific page or all the pages in the site.
Add a Promoted Links List on your Page
The app displays links as icons or tiles on a web page once the web part is added.
Create a Promoted Links List
- From the homepage of your site on the Quick Launch click Site Contents.
- On the Site Contents page under Lists, Libraries and other Apps click add an app.
- Scroll down and click Promoted Links.
- In the Name section give it a name, for example, "PromotedIcons"
- Click Create
- Back on the Site Contents page locate and click on your Promoted Links list, in this example “PromotedIcons.”
- At the top of the page click ITEMS to expand the ribbon.
- In the New section click New Item.
- Review your information and click Save.
Add the "PromotedIcons" Web Part to a Page
- From your SharePoint site, open any page you would like to add the web part.
- At the top of the page click Page, to expand the ribbon
- In the Edit section click Edit
- Click anywhere within the outermost grey line and press Enter
- At the top of the page click the INSERT tab
- In the Parts section click Web Part
- Make sure the Apps category is selected and under Parts click “PromotedIcons” (or whatever you called your Promoted Links list).
- Verify the “PromotedIcons” list is selected under About the Part and click Add
- On the ribbon, click Save
Need Help?
Contact the IT Service Desk, or call 519.748.5220 ext. 3444.