Recognizing the Type of Interactive Whiteboard
- Touch Interactive Whiteboard
-
Pen Interactive Whiteboard
-
Locating the Pens for the Interactive Whiteboard
Use the Easy Interactive Whiteboard
Use the Easy Interactive software
Using Whiteboard Mode
Quick Guides
Handy, printable guides for you to take with you into the classroom or meeting room.
Recognizing the Type of Interactive Whiteboard
Touch Interactive WhiteBoard
If your classroom has
a whiteboard, an Epson Wi595 projector mounted close to the wall, and a
white rectangular box mounted above the whiteboard, you have a classroom with a touch-responsive board.
Use your hands or the Interactive Pens located on your podium to treat your screen as a large tablet.
Pen Interactive WhiteBoard
If your classroom has a whiteboard, and an Epson Wi595 projector mounted close to the wall, you likely have a classroom outfitted with Easy Interactive Software. Use the Interactive Pens located on your podium, to treat your screen as a large tablet.
Locating the Pens for a Pen Interactive Whiteboard
The pens are stored inside a white casing, labelled Epson, attached to your room's podium. There are two battery operated pens.
Please return these to the case at the end of class. If you require new batteries, call or email the
IT Service Desk with your request and the room number.
Using the Easy Interactive Whiteboard
Set Up the Podium
- On the podium, turn the display ON, by following the DVP Guide in your classroom.
- Turn on your podium PC.
- Determine whether yours is a touch board or will require using the interactive pens.
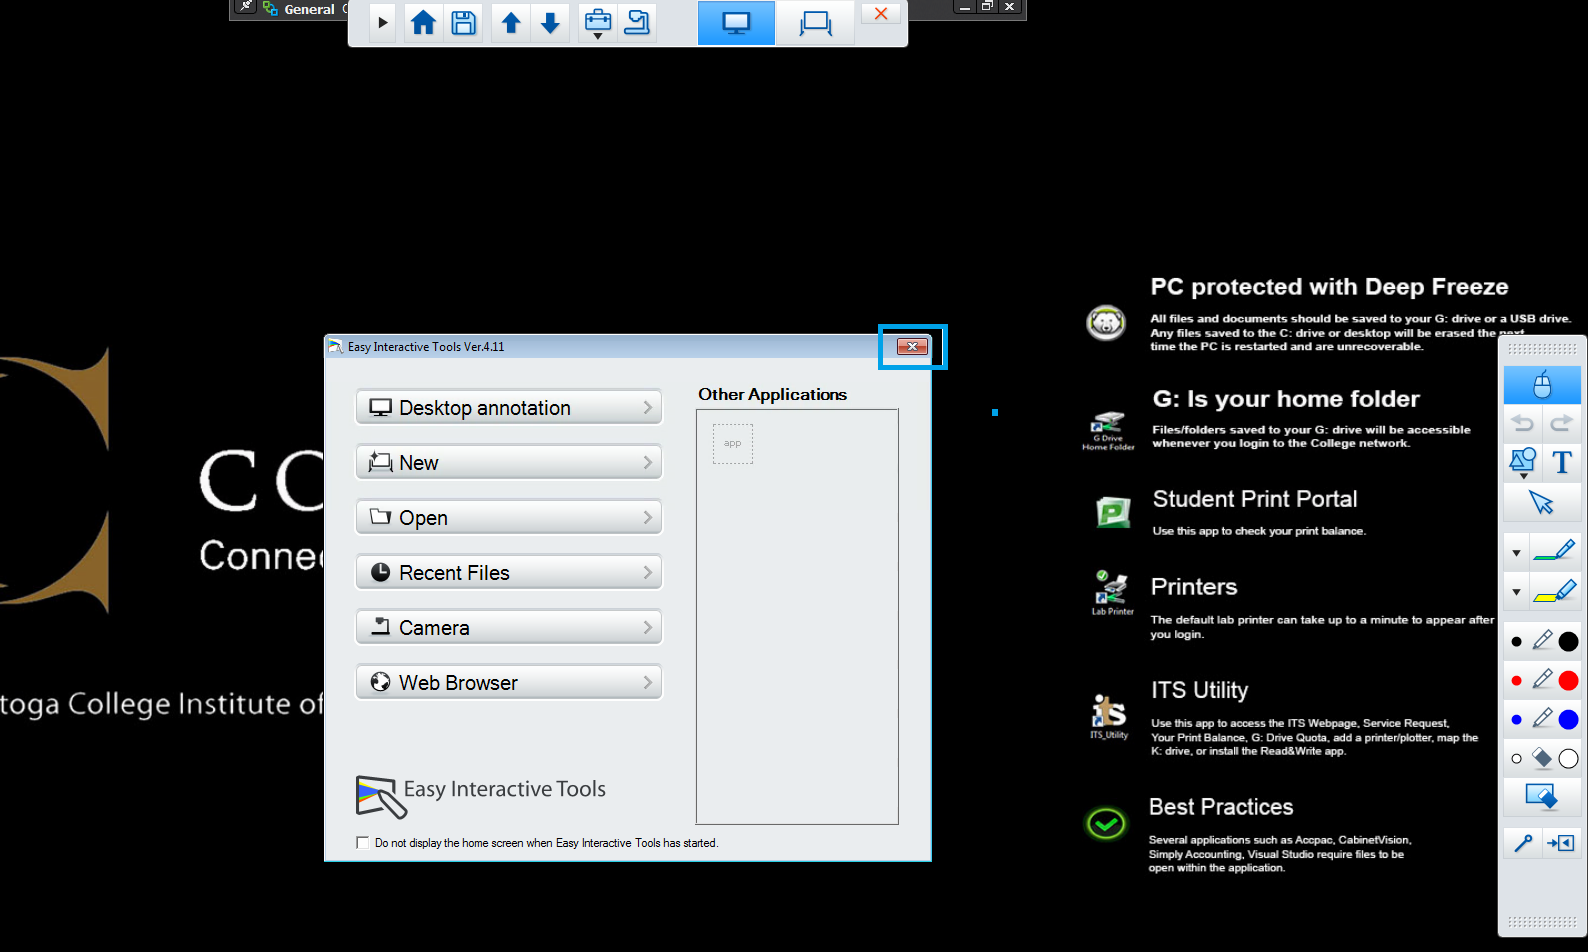
- The Easy Interactive software will open with the PC. If the software does not automatically start with the PC, search for it in the Start menu, or find the shortcut on the desktop.
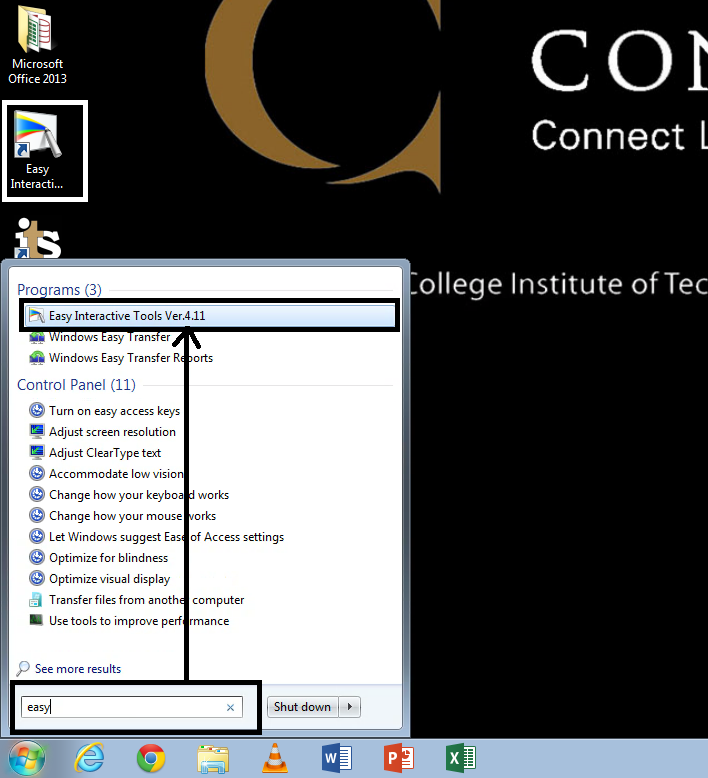
The buttons will be inactive until you close the Home window by clicking the red X. You are now ready to use your Interactive whiteboard.
Use the Easy Interactive Software
The Easy Interactive software has two toolbars: the Annotation Bar and the Command Bar.
Annotation Bar
This bar controls how you write on and mark up the screen. It lets you do things like write or highlight, and erase. It always looks the same, no matter what mode you are in.
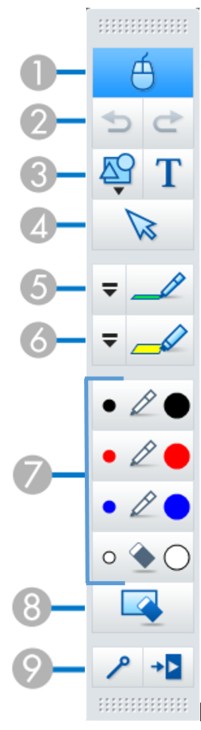
- Mouse mode - Switches between pen tools and mouse mode. If you are stuck in pen mode, touch this.
- Undo and Redo.
- Draw Shapes and Add Text - Select the tool, then touch and drag where you want the shape or text to go.
- Select - Move items or adjust their size.
- Pen - Click the arrow to the left of the icon to change the colour and width of the pen line.
- Highlighter - Click the arrow to the left of the icon to change the colour and width of the highlighter line.
- Quick Tools - Select a blue, red or black Pen or an Eraser quickly. Click on the right of the icon to draw thick lines, and click on the left of the icon to draw fine lines.
- Clear screen - Clears everything drawn on the display.
- Always Show Toolbars and Close Toolbar.
Command Bar
This bar controls how you're using the screen as a whole. It lets you switch between PC Mode and WhiteBoard Mode.
*The Command Bar is closed when you are using the pen tools.

PC Mode
This mode lets you touch the screen or tap the pen to open and use programs, or browse the Internet. The screen will respond like a large tablet.

- Home - Opens the Home Screen.
- Save - Allows you to save your annotations as a WhiteBoard file.
- Up - Scroll up on the web page you are viewing.
- Down - Scroll down on the web page you are viewing.
- Additional Features (see How to use Easy Interactive software Guide)
- Document Camera - Project images from a Document Camera.
- WhiteBoard Mode - switch to a clean whiteboard screen.
- PC Mode - Here, PC Mode is selected.
Whiteboard Mode
This mode lets you touch or tap the pen to write on a whiteboard screen. You can write, draw or add pictures to a slideshow, and save this to your OneDrive.

- Home - Open the Home Screen.
- New WhiteBoard File - Create a new file.
- Open File - Open a previously made whiteboard file.
- Save - Save whiteboard pages as several file types.
- Page List - Displays a list of thumbnails of all pages in use.
- New Page - Creates a new whiteboard page after your current page.
- Copy Page - Duplicates the current page and adds it next in the list.
- Delete Page - Deletes the current whiteboard page.
- Up/Down - Move up or down to the next whiteboard page.
- Additional Features - (see How to use Easy Interactive software Guide)
- Document Camera - Project images from a document camera.
Whiteboard Mode
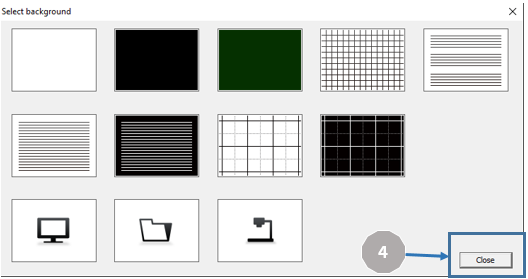
How to Insert a Background on your Page
This option lets you change the background on your screen. You can choose from various pre-built backgrounds and use them to write, draw or add special diagrams to a slideshow.
1. Click on Other Tools from the main toolbar.

2. Click on Select Backgrounds from the menu.
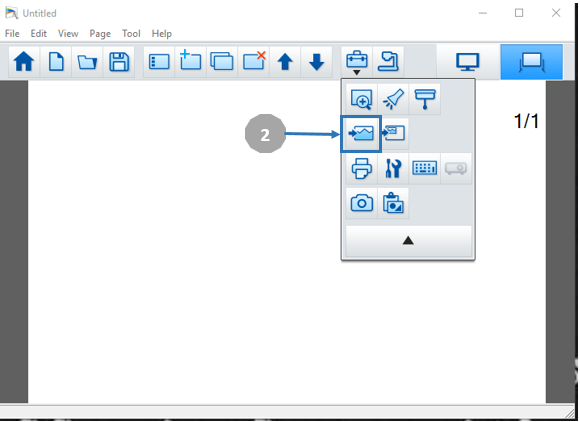
3. Select the desired background from the options.
4. Hit
Close to start using the background.
Need Help?
Contact the IT Service Desk, or call 519.748.5220 ext. 3444