Set Up Lync
To set up Lync (Skype for Business), go to your Start Menu and search for Skype for Business or Lync. Click on the program name to open it. Your software may vary from the images below.
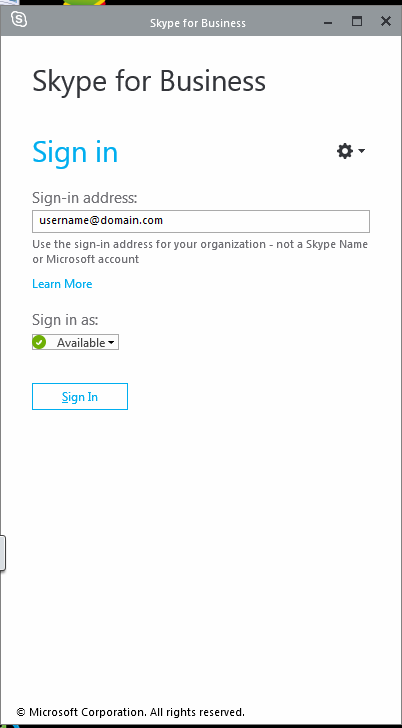
Enter your email address in the program login window. Click Sign in. When prompted, enter your password in the field below. Click Sign in again.
*Currently, we are upgrading our Lync experience. You may be prompted to Restart Skype for Business in order to use the currently available version. Choose Restart Now. If you are having trouble getting Lync to start, please email the IT Service Desk and include a description of the problem in the body of your email.

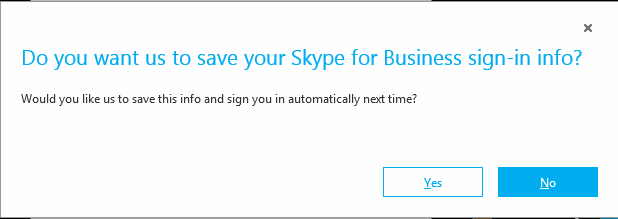
You may be asked if you want Skype for Business to remember your sign-in information. Choose Yes.
Lync (Skype for Business) will open. You will see your Name, Availability, and the option to Set your Location at the top. Use drop-down menus next to each to change these options. Add a personal message in the What's Happening Today? Keep in mind this message is visible to all faculty and staff using Lync.

Lync Overview
Instant Messaging (IM)
Search for their name in the Find Someone search bar. Lync will search the college Directory.

You will see their name, and a colour coded indication of their available status. You may also see information telling their role at the College, and how long ago they were last connected.
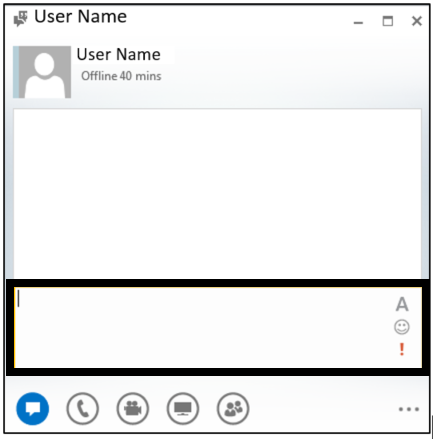
Click their name or picture to begin chatting instant messaging. A chat window will open. Type in the box at the bottom to begin, and hit enter to send your message.
Call
To call a person, use the Phone icon, at the bottom of the chat window. This will call them, and you can communicate using the inbuilt microphone on your laptop, or a microphone headset.

Video Call
To Video Call someone, use the Video Camera icon, at the bottom of the chat window. This will call them and allow them to view your webcam. You can communicate using the inbuilt camera and mic on a laptop or computer, or a mic headset.

Share Your Screen
To share your screen, use the Screen icon at the bottom of the chat window. This will not call them, and you can communicate using the text messaging. Choose whether to share a Primary or Secondary monitor, a Program, a Whiteboard screen, or Poll. Share a OneNote notebook document or an Attachment.
Participants have the ability to Request Control of the presentation, and will be able to remotely control your presentation or desktop.

Invite More people to the Chat or Call
To invite more participants in your chat or video call, use the People button at the bottom of the chat window. This will bring up a list of the people participating in the chat, and allow you to invite more by clicking Invite More People. Search by name, or see a list of your most frequently chatted contacts.

Video Call, and Share your Screen
You can use the features together, to share your screen while on a Call or Video Call. You can continue to chat, or talk using the inbuilt camera and mic on a laptop or a mic headset.
Create a Contact List
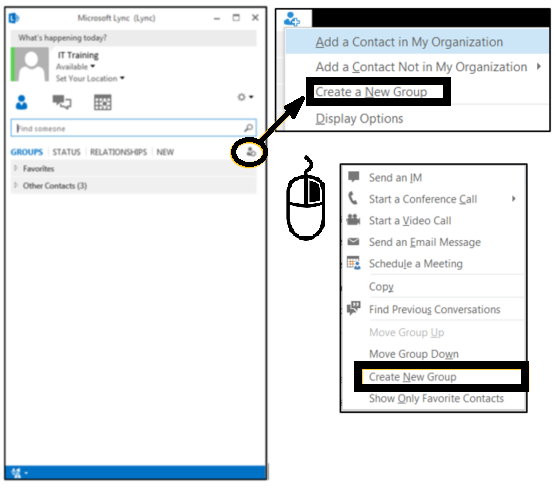
Right-click on one of the default Groups in the Lync software. At the bottom of this menu, choose Create New Group.
Or, click the Add Person/Group icon, and choose Add New Group.
Add New Contacts
The easiest way to add a contact is to use the Find Someone search bar. Right-click that person and choose Add to Contacts List. Select the contact list to add them to.

Add Someone From Outside the College as a Contact
Currently, we are unable to add this feature to Lync. Please check back for future developments.
Create a Lync/Skype Virtual Meeting
Lync/Skype virtual meetings are best suited for a maximum of 7 participants (with video), or a maximum of 20 participants (with just audio). Please note: you can not book a virtual meeting in the Outlook Web App.
Open Outlook on your computer. It will be in your Task Bar or Start Menu. It is not necessary for you to have Lync running to book a Lync (Skype) Meeting.
In Outlook, go to your Calendar.

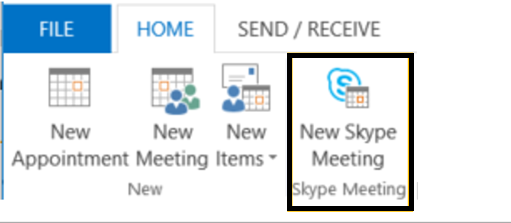
In the Home ribbon, choose New Skype Meeting.
A meeting request window will open, with a link to -->Join Skype Meeting included in the body of the email. This link will allow you and your participants to connect to the meeting.
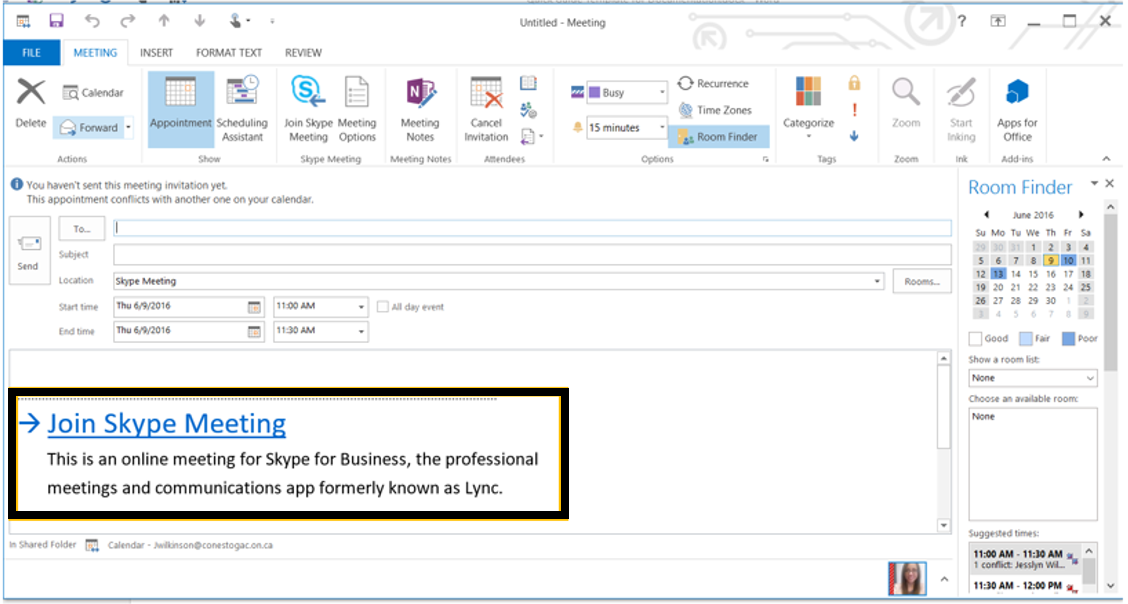
Continue to build the meeting request as you usually would. You can add email contacts from outside the college. Refer your meeting participants to the Guests section of this page so they can successfully connect to your meeting.
When done, simply Send the meeting request. Participants will receive an email, notifying them of the virtual meeting. When they accept or decline the meeting, you will receive an email notification.
Presenters
Lead a Virtual Meeting
- On the date of the meeting, ensure your mic and headset or other audio equipment is working, in advance.
- Fifteen minutes prior to your scheduled meeting, open the event in your calendar.
- Click -->Join Skype Meeting. As the first person in the meeting, you will automatically become the primary presenter.
- As the presenter, you can allow participants in, and designate other presenters.
Add a Guest from outside the College
Yes, you can use Lync (Skype for Business) to host virtual meetings with people from outside the college. When creating a virtual meeting, include that person's email address as an Attendee in the To... field of the meeting request. Then refer them to the Guests section to make sure they can connect.
Guests
Accept a Virtual Meeting
In Your Gmail Account
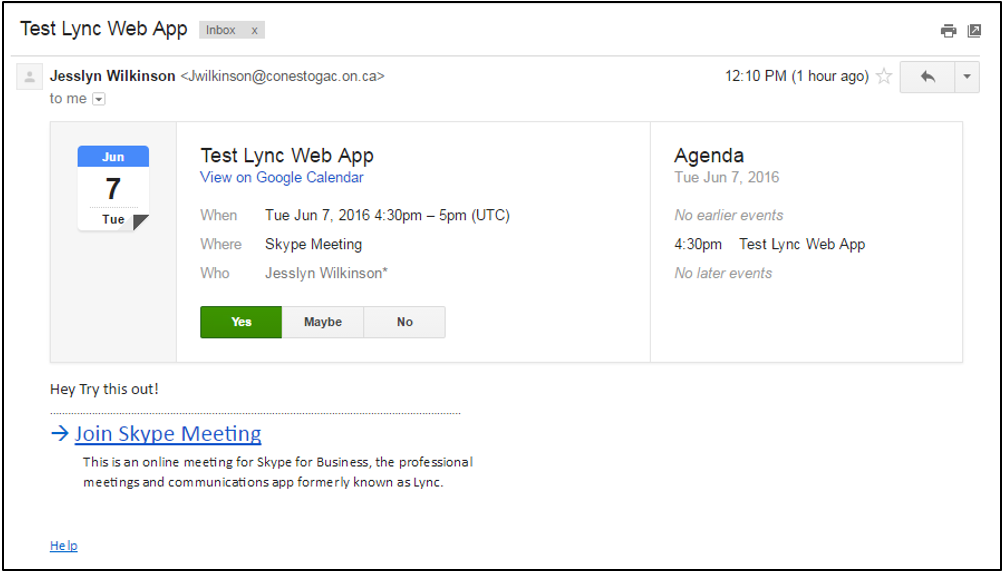
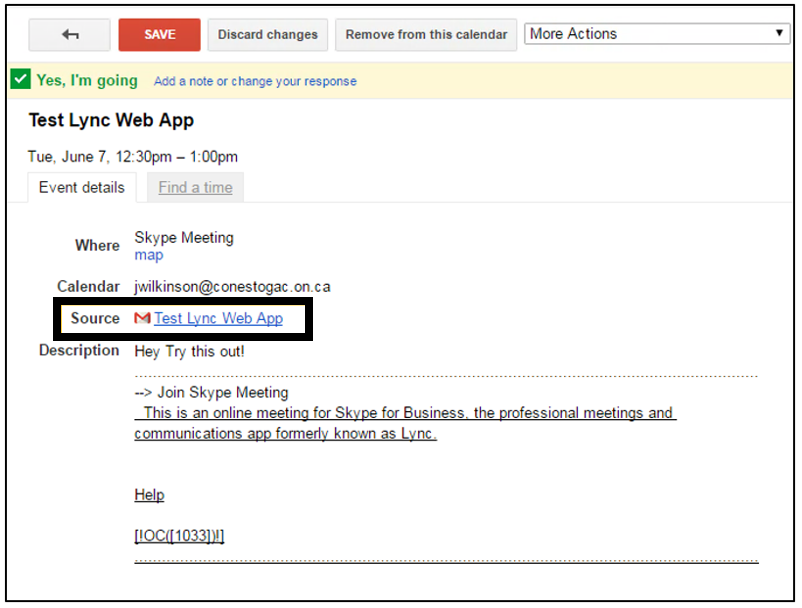
- You will receive an email in your inbox from a Conestoga College email account. It should appear similar to the below message.
- In the message, confirm or decline your participation in the meeting by clicking Yes, Maybe, or No. This will send a confirmation email to the meeting organizer.
- Add the meeting to your own Google Calendar, if you like. To do so, click View on Google Calendar below the event name.
- In the window that opens, choose Save to add this to your calendar.
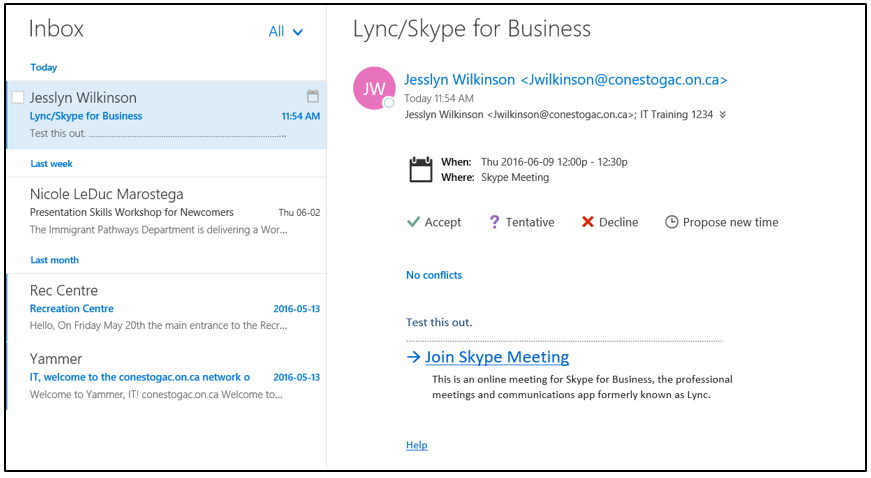
In your Microsoft or other Account
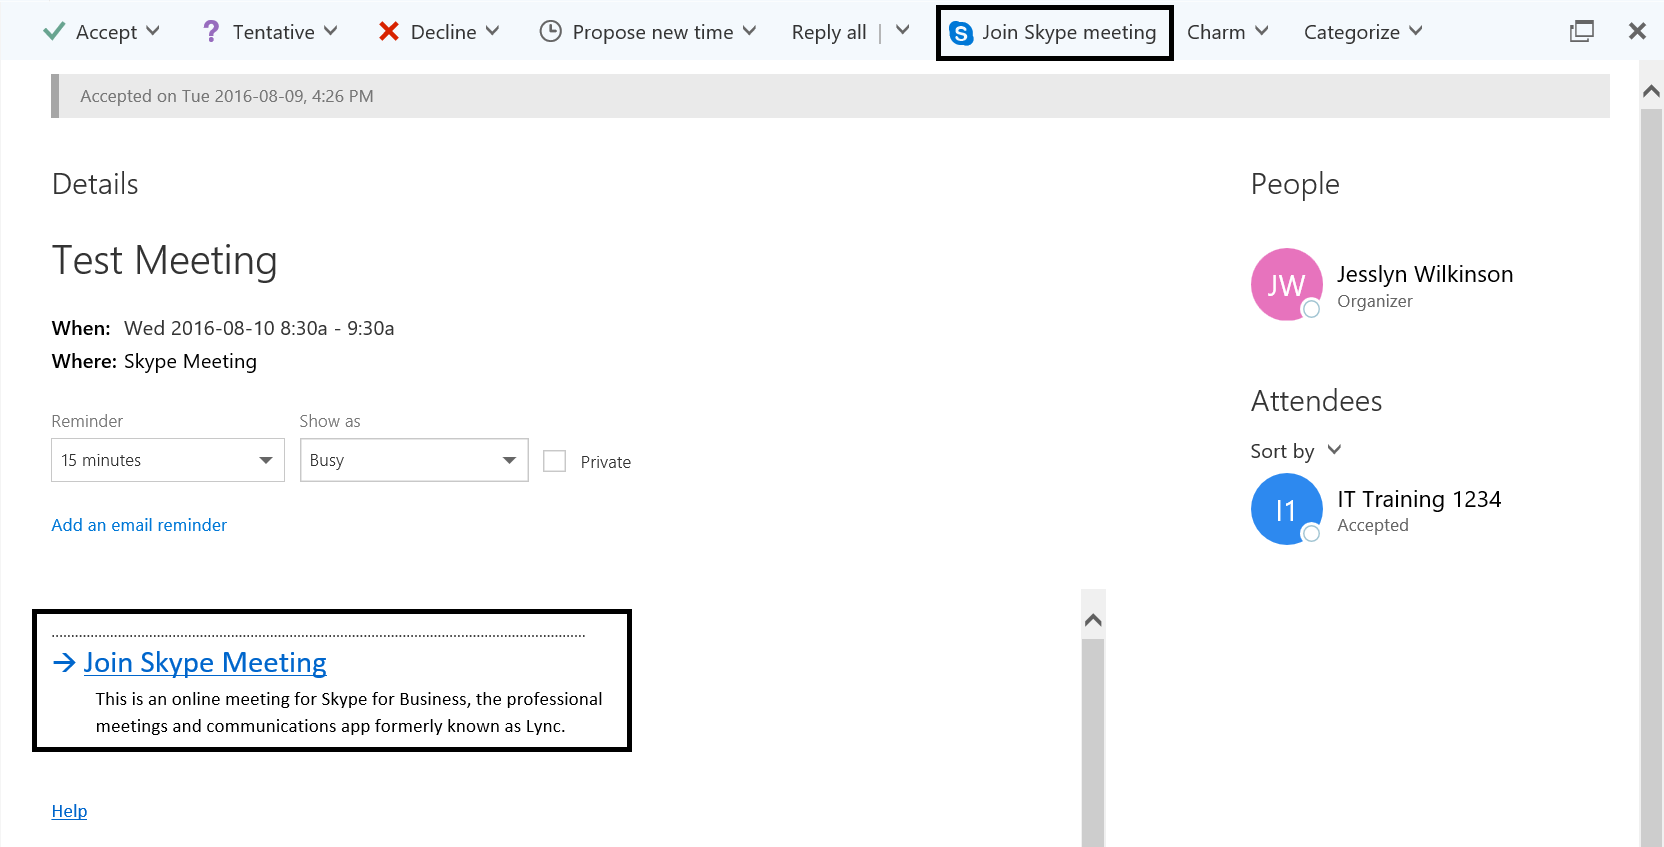
- In the message, Accept or Decline your participation in the meeting. You can also Propose a New Time.
- If you choose to accept the event, you will be asked to choose from the options to: Edit the response before sending, Send the response now, or Don’t send a response. Choose either of the first two options.
- This will send a confirmation email to the meeting organizer.
- The meeting request email will disappear, and the event will be automatically added to your Calendar. Find your Calendar by clicking the Waffle, and selecting Calendar.
Join a Virtual Meeting
Please note: This process will only work when you are using Internet Explorer. .
Verify your microphone and webcam are working prior to attempting to connect.
Gmail accounts
Open your meeting event in your email's calendar, and click the linked text next to Source. Click the linked text --> Join Skype Meeting.
Microsoft and other accounts
Open your meeting event in your email's calendar, and click the linked text --> Join Skype Meeting.
- If you have Lync or Skype for Business installed on your computer, the software will open, and you will join the meeting. If you do not have Lync or Skype for Business installed, then continue to step 4.
- A new tab will open. If this is your first time using Skype Meetings, you may need to download Microsoft Silverlight and Lync Attendee. *Note: These will not work in Chrome or Firefox so you may need to open them in Internet Explorer.
- Once you have downloaded Silverlight and Lync Attendee, return to step 3. Skip from there to step 6.
- If you receive a Security Warning, choose Yes to allow the trusted site to open.
- Lync 2010 Attendee will open. Choose Join as Guest and enter a Display Name. Choose Join to enter the session.
- You may be required to Wait in the Lobby until the presenter approves your attendance.
- By default, your audio will be muted. Choose to unmute your audio if you are ready.
- Allow the Meeting Organizer to initiate the communication via chat or audio. Check out the Overview of Lync Attendee, while you wait.
To Download Silverlight
- In the browser, click Download and Install Microsoft Silverlight.
- Choose the installation appropriate for your Operating System, by choosing either Install for Windows or Install for Macintosh.
- If you will use Lync Meetings often, save the .exe file to your hard drive, in the automatic location. To delete Silverlight later, just discard this file into the Recycle Bin. If you will only use it infrequently, just continue to Step 4.
- Click run on the installation (.exe) file. It may appear at the bottom of your browser, or be in your downloads folder.
- In the Install Silverlight window, unselect any options you do not want, and choose Install Now.
- Do not restart your browser yet if you still need to download and install Lync Attendee.
To Download Lync Attendee (Web App)
- In your browser, choose Download and Install Lync Attendee.
- A new tab will open. In that window, choose the Download option.
- Allow the download process to start by clicking Save when the .exe file opens.
- Open the .exe file by clicking on it when it finishes downloading. It will be either visible in your browser, or in your Downloads folder.
- In the window that appears, click Run.
- Accept the terms in the License agreement and choose Install.
- Allow the process to complete, and click Finish.
- Restart your browser. Return to Step 3 in To Attend a Meeting. Proceed from there to step 6.
Overview of Lync Attendee
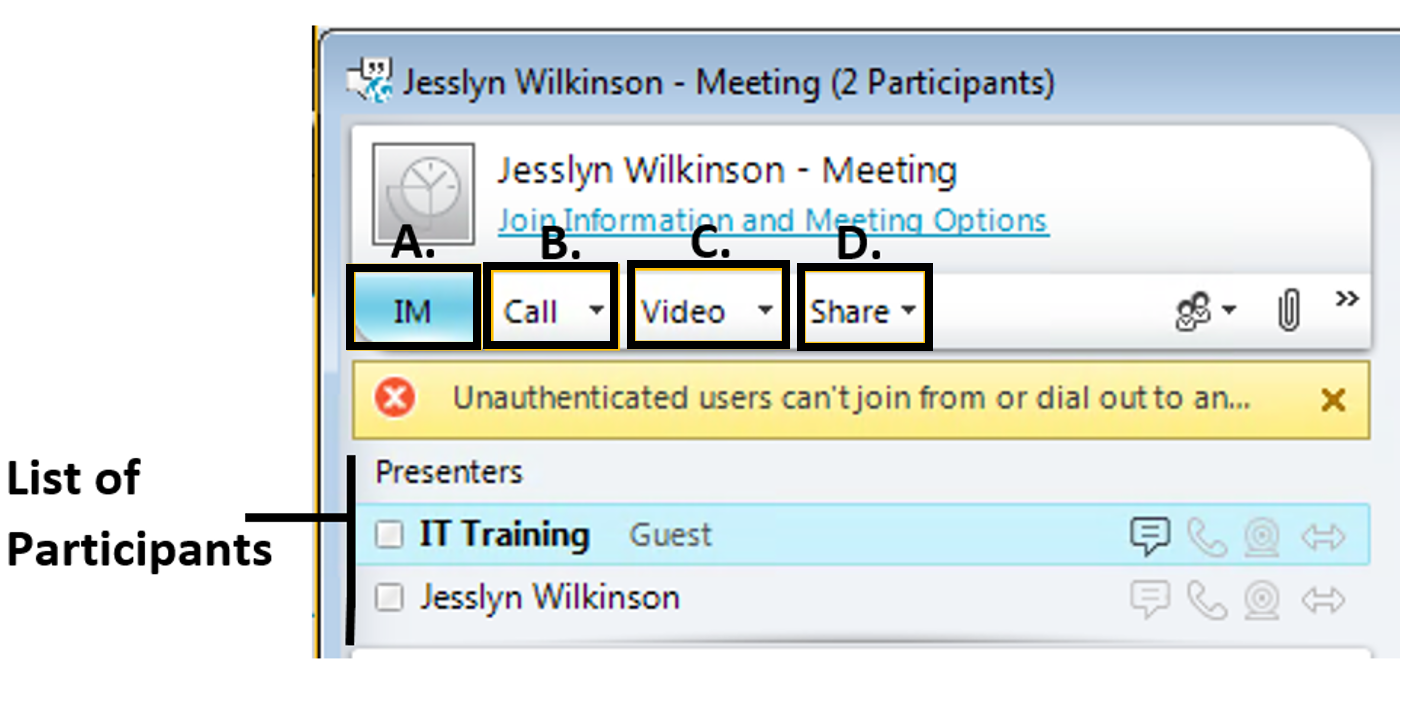
This section will provide an overview of the menu features available in the Lync 2010 Web App. Pay attention to yellow notification bars for important information.
A. Instant Message – opens an Instant Messaging window, much like MSN or Skype, below the list of participants. Chat here, using your keyboard to type.
B. Call – Join an ongoing Skype conference call using your computer’s audio. Currently, guests are not able to use a phone option.
C. Video – Using your webcam, initiate a Video Call, or change Video Device Settings.
D. Share – Can only be used if you are a presenter. (The meeting organizer can designate you as a presenter by right-clicking on your name in their software.) Choose whether to display your Desktop, a particular Program…, your PowerPoint Presentation, a blank Whiteboard, or a small Poll for your audience. This will appear to the right of the attendee list and chat window.
Need Help?
Contact the IT Service Desk, or call 519. 748. 5220 ext. 3444