What is GoToMeeting?
As one of our webconferencing solutions, GoToMeeting allows you to webconference with up to 25 participants. GoToTraining allows you to webconference with up to 250 participants. GotoMeeting offers online support in addition to this information.
Book a GoToMeeting
There are 5 GoToMeeting accounts (maximum 25 participants) and 5 GoToTraining (maximum 200 participants) licenses for general use for college staff and faculty. The process for booking a GoToMeeting or a GoToTraining are the same.
To book a GoToMeeting, you are effectively booking a normal meeting, but with:
- the Attendees,
- a Meeting Room, and
- a GoToMeeting or GoToTraining license.
In Outlook
In order to book the GoToMeeting in Outlook, follow these steps:
- Open your Calendar in your Outlook.
- Create a New Meeting.
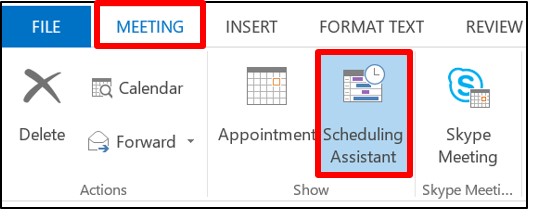
- In the New Meeting window, click the Scheduling Assistant.
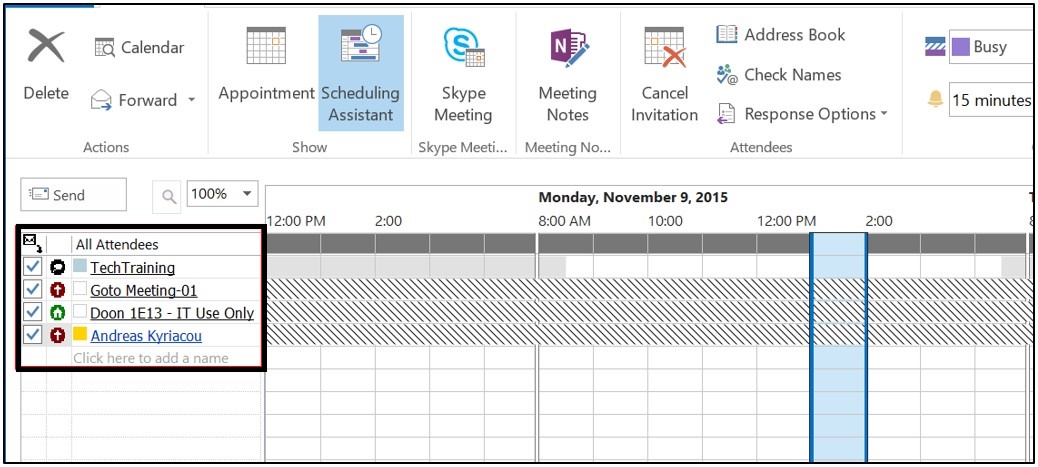
Ensure the date and time of your intended meeting are correct. Click Add Attendees to begin adding your components.
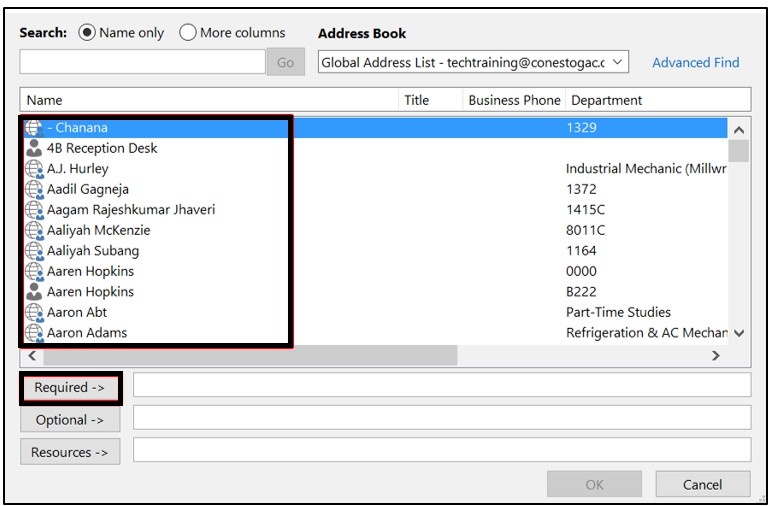
Because the first Address Book displayed is your Global Address List, it may be easiest to Add Attendees first.
Add Attendees
Search for the individuals' names, and click Required--> to add them to the list of attendees. If you are using GoToMeeting with someone outside the College, just enter their email address manually.
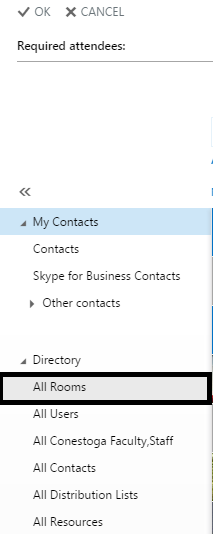
Book The Room
Using the
Address Book drop-down menu, change the list to
All Rooms. Find the room you would like to reserve for yourself and other local attendees to use. If you are not sure which meeting room will suit, use the Room Configuration app to find one. (You can search by the kind of hardware you are looking to find.) Any room with a Digital Video Projector (DVP) should suit your need, though
you may need a portable webcam (includes microphone) if you are connecting with the podium's PC.
Request this through EdTech. 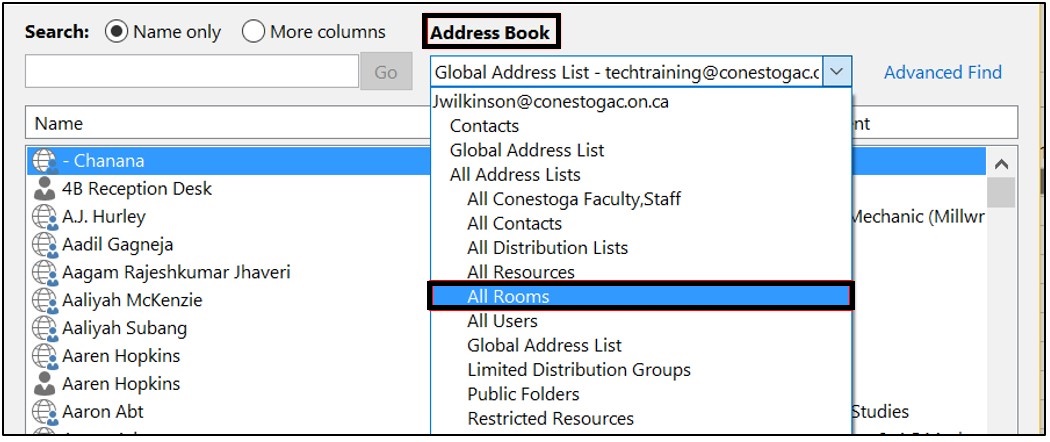
Book The GoToMeeting License
Using the
Address Book drop-down menu, change the list to
All Resources, and check out the list of GoToMeeting licenses. Choose one, and click
Required-->.
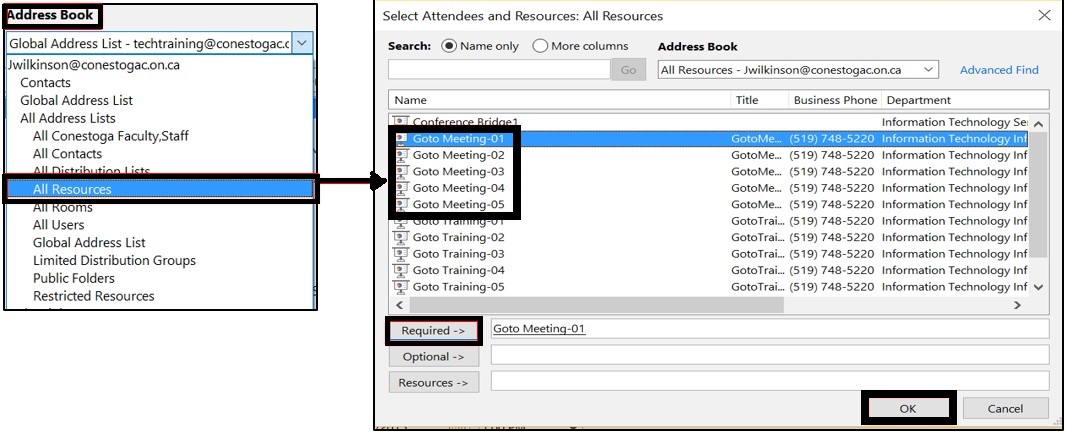
You will now see your Attendees, your Room and the GoToMeeting in the Scheduling Assistant. Resolve any scheduling problems by adjusting the date or time of the meeting. Click Send to email your meeting request to all attendees, rooms, and licenses.
Continue on to the Confirmation Email section.
In OWA (Employee Email)
In order to book the GoToMeeting in Outlook, follow these steps:
- Open your Calendar.
- Create a +New Event.
- Title the event.
- Set the date and time of your intended meeting.
- In the Attendees field, click the + plus sign.
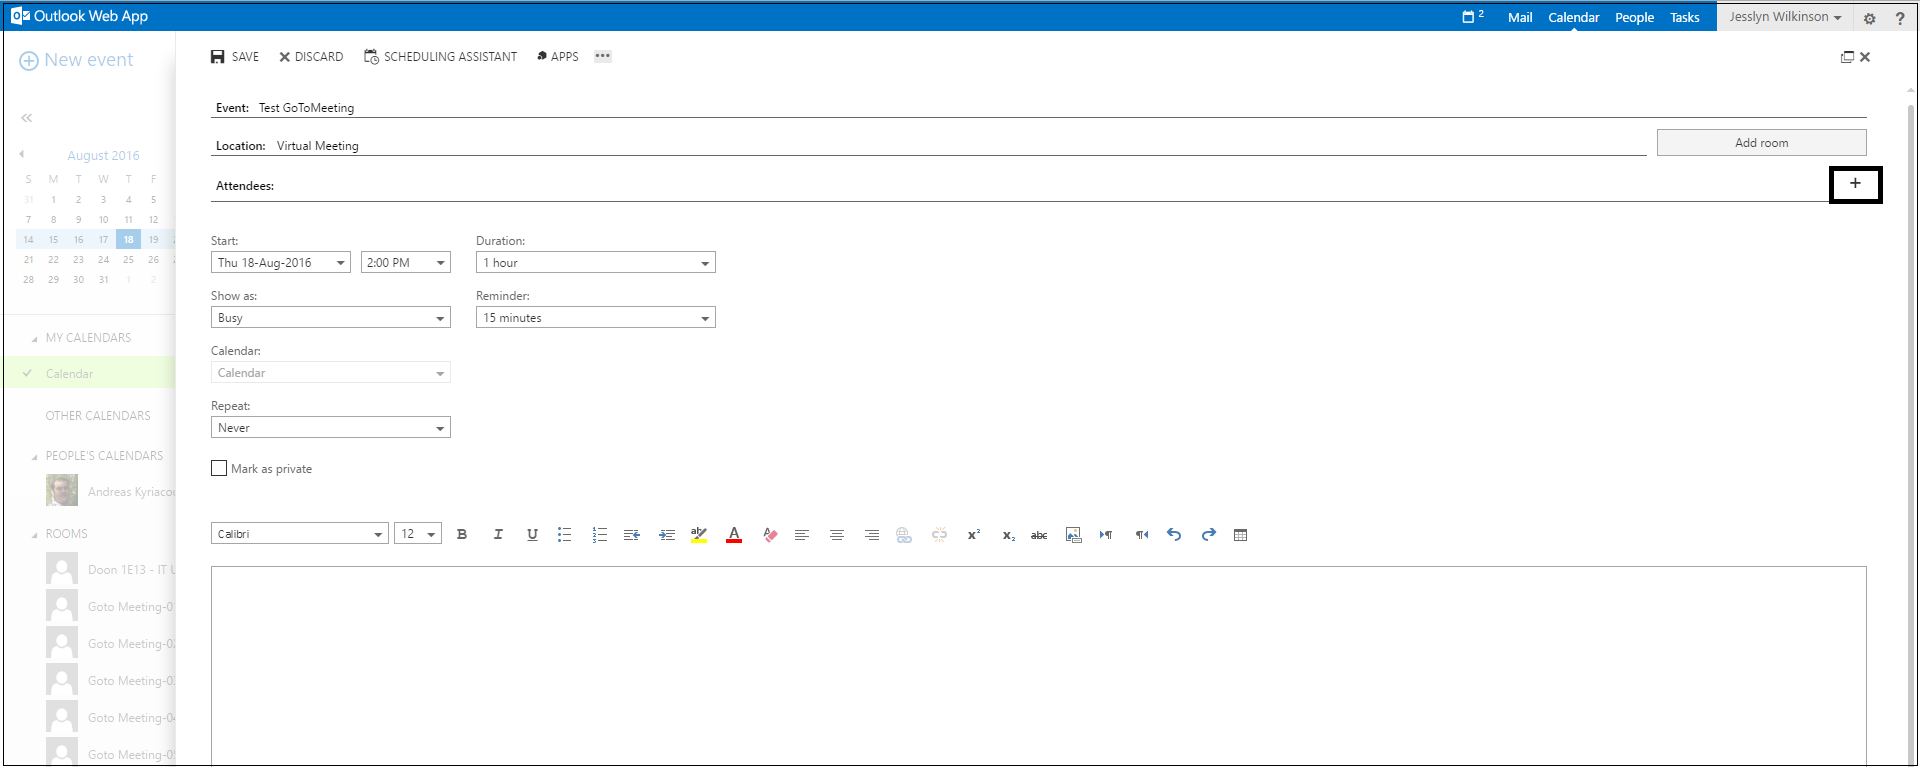
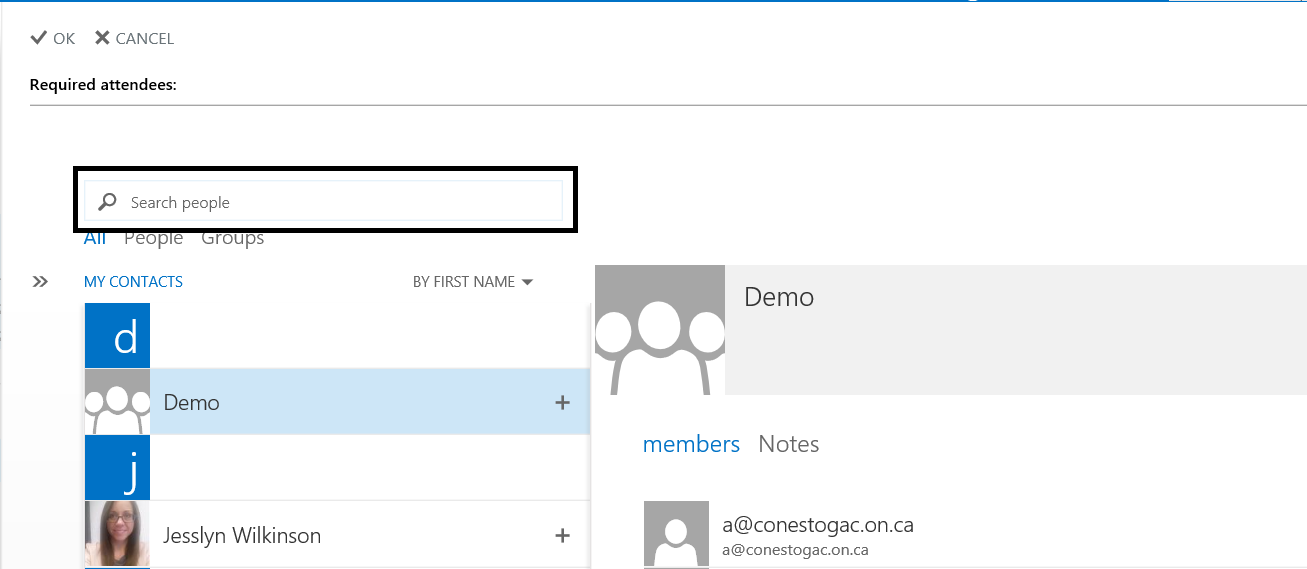
Because the first Address Book displayed is My Contacts, it may be easiest to Add Attendees first.
Add Attendees
Search for the individuals' names, and click the plus sign (+)to add them to the list of attendees. If you are using GoToMeeting with someone outside the College, just enter their email address manually.
Book The Room
Change the Address book by clicking the double arrow to the left of the Required Attendees window.
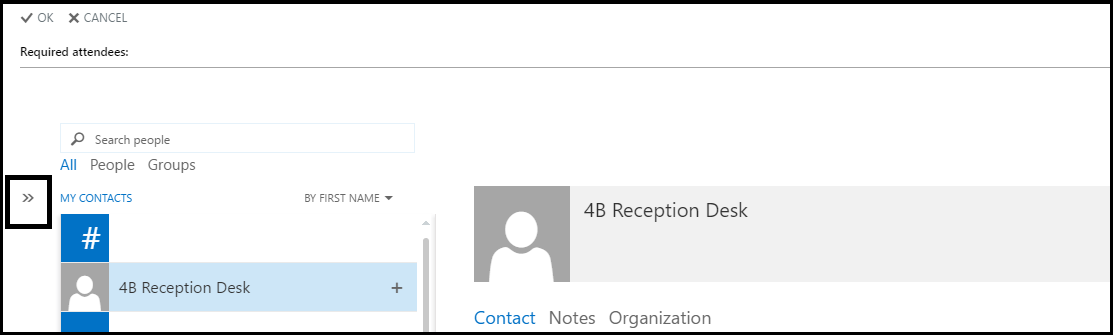
Using the Address Book drop-down menu, change the list to All Rooms.
Find the room you would like to meet in. If you are not sure which meeting room will suit, use the Room Configuration app to find one. (You can search by the kind of hardware you are looking to find.) Any room with a Digital Video Projector (DVP) should suit your need, though you will need a portable microphone and webcam if you are connecting with the podium's PC. Reserve these through EdTech.
Book The GoToMeeting License
Using the
Address Book drop-down menu, change the list to
All Resources, and check out the list of GoToMeeting licenses. Choose one, and click the
plus sign (+) next to it to add it to your participant list.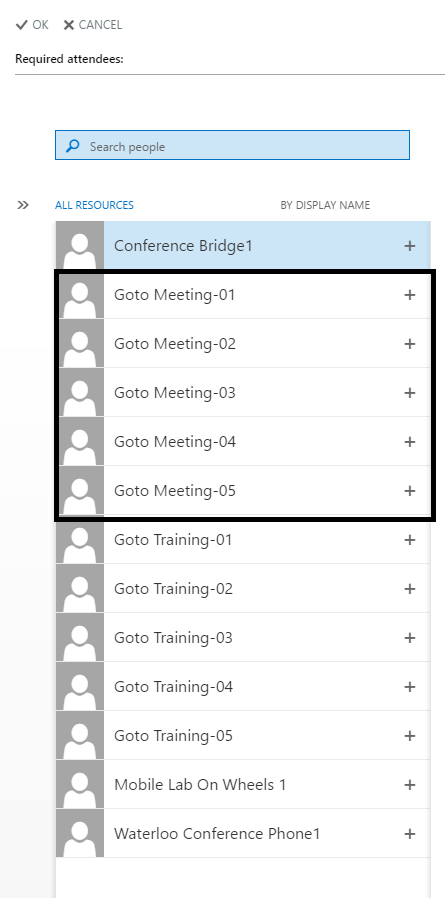
You will now see your Attendees, your Room and the GoToMeeting in the Scheduling Assistant. Resolve any scheduling problems by adjusting the date or time of the meeting. In the body of the email, include a link for your participants to read the below information on how to accept your Meeting Request. Click Send to email your meeting request to all attendees, rooms, and licenses.
Confirmation Email
For the Host
If you successfully have booked the license, you will receive a confirmation email from the GoToMeeting account, accepting your request. Keep this email, as it gives you your login information.
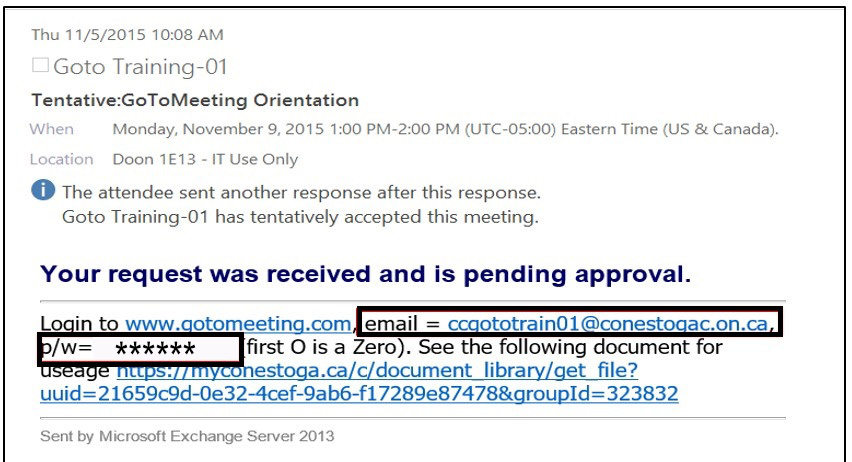
If the license is not available, you will receive an email declining your booking. Just change your meeting request to use a different GoToMeeting or GoToTraining license in the Scheduling Assistant if this happens.
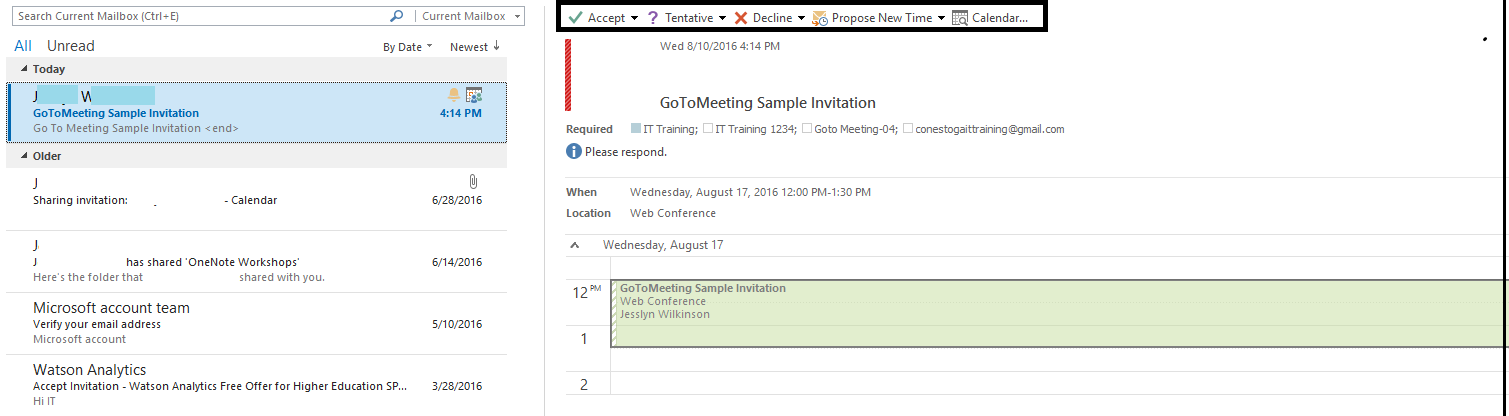
For Participants
You will receive one of the below confirmation emails, depending on your email account type. Click to accept or decline the invitation to join the GoToMeeting. It will be added to your calendar, and you will receive the link to join the meeting just prior to the meeting time. Please test your mic and webcam, prior to the meeting, to ensure there will be no technical issues.
Outlook
In the invitation email, click Accept, Tentative, or Decline. This will be added to your calendar.
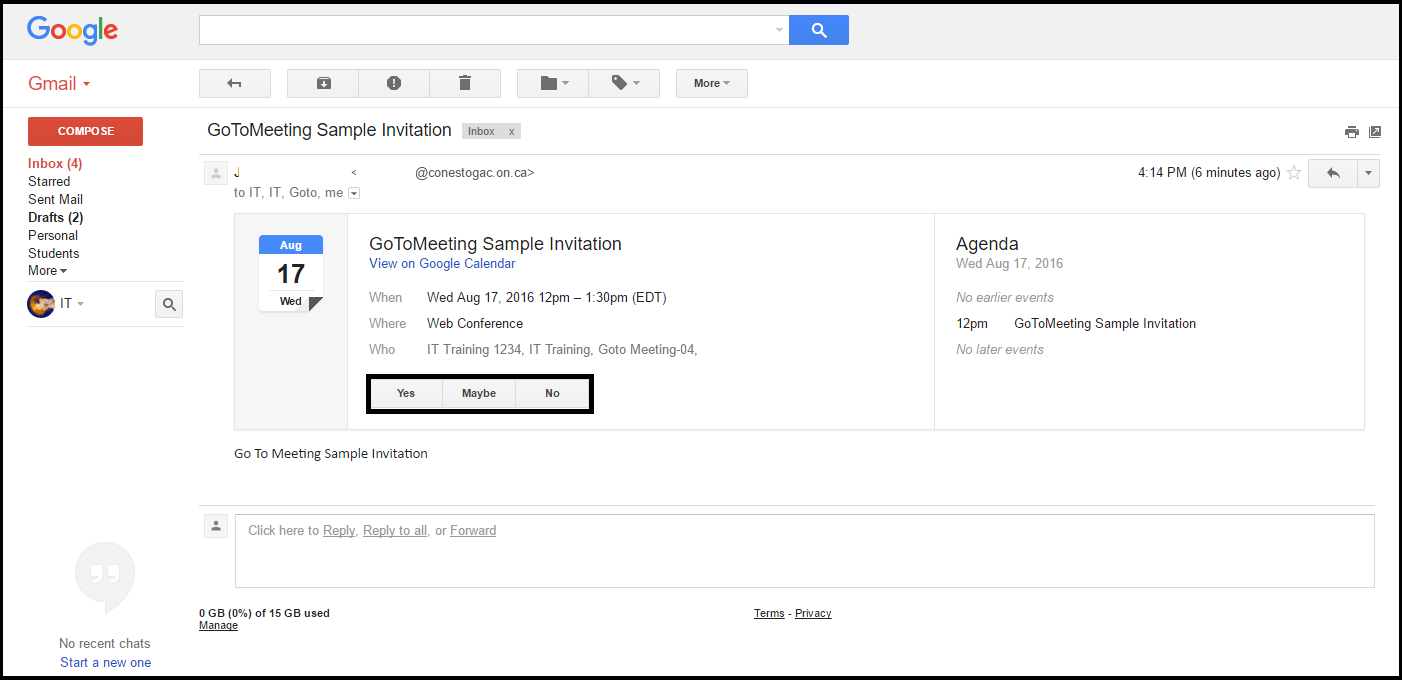
Gmail
In Gmail, click Yes, Maybe, or No to respond to the meeting request. Then, add the event to your calendar.
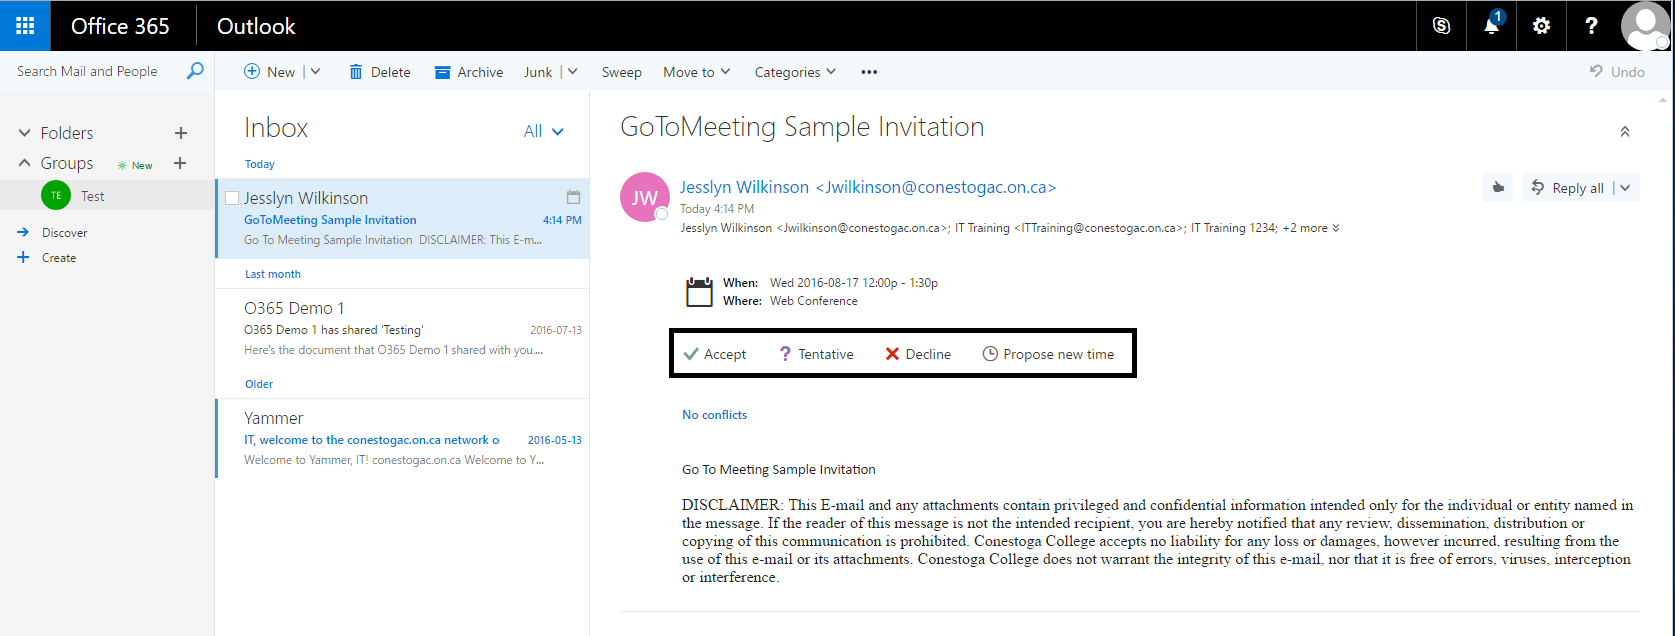
Office 365
In Office 365, click Accept, Tentative or Decline to respond to the meeting request. The event will be added to your calendar.
Host a GoToMeeting
Get Set Up
On the date of the meeting, ensure meeting room resources are working well before beginning. Contact the IT Service Desk if you need any assistance with testing webcams or microphones.

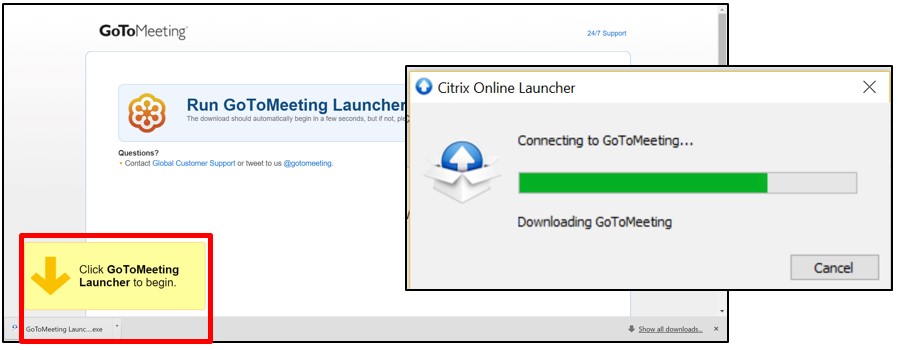
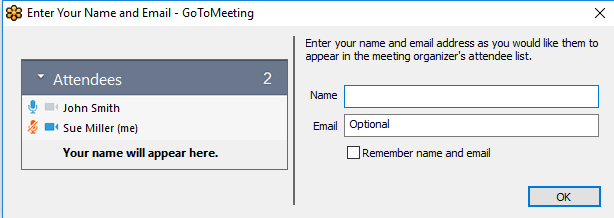
A login window will appear on your desktop.

You will be asked to Enter your name and email to identify you to your audience.
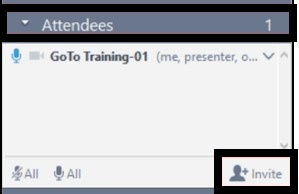
Send Out the Link
Send an email invitation to your guests to invite them to your GoToMeeting by going into the Attendees section. Click +Invite to create an email link for them to click into. This can be done just prior to the meeting.
Lead the Meeting
Determine whether you'd like to use your computer's audio, or a phone to connect to the meeting.
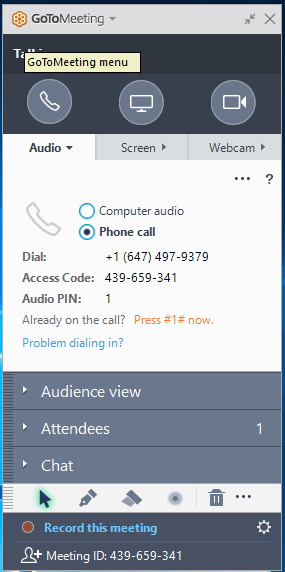
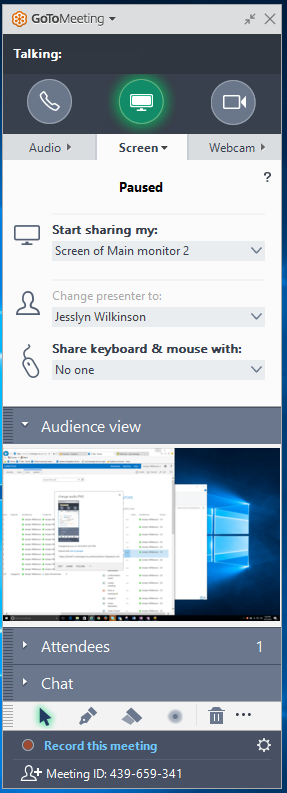
Designate the Presenter (if other than you) by going into the Screen settings, and using the Change Presenter to: drop-down menu.
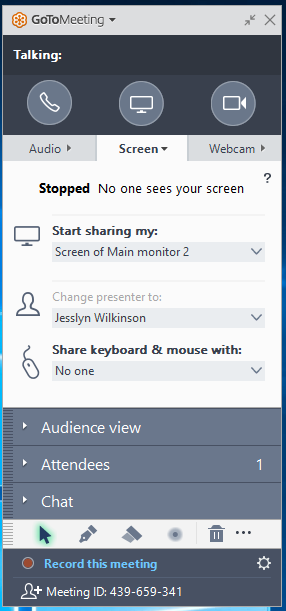
Choose whether or not to share your screen by clicking the monitor icon. In the Start sharing my: drop-down menu, choose whether you want to share your screen or some specific software program.
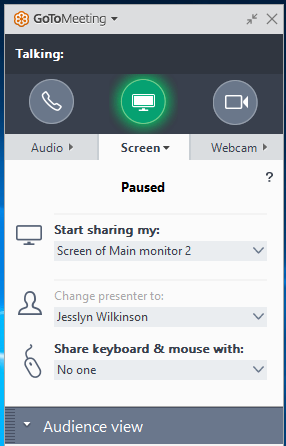
Preview what your audience will see by clicking Audience View.
Using GoToMeeting
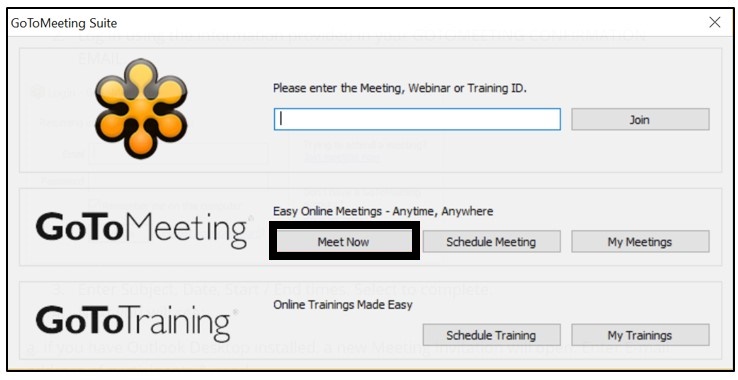
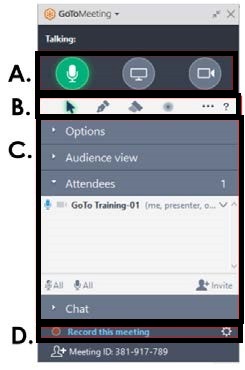
Before using GoToMeeting, take some time to get familiar with how it works.
A. Program Controls – choose whether to share your Microphone, Screen, or Webcam.
B. On-Screen Annotation – allows you to notate on your desktop, or over your browser using Pen and Marker Tools.
C.Quick Menus – The bulk of the program offers quick action windows to make changes to input or screens, see what your audience may see, add attendees, and use IM chatting.
D. Information and Settings Options - Displays a visualization of whether you are recording, and allows you to change settings in the Settings gear.
Need Help?
Contact the IT Service Desk, or call 519.748.5220 ext. 3444.