Room Types
Conestoga supports Standard Classrooms, BYOD Classrooms, and Active Learning Classrooms. They all use the same podium controls, device connections, audio controls, and lighting. In addition, Teaching Booths are now available for booking.
Standard and Active Learning Classrooms
- a podium, with connection controls,
- Windows 10 PC,
- an interactive digital video projector (DVP).
A room might be an active learning class, a lab or a classroom. On your timetable, a lab is indicated by the LA1 designation below a course code. Learn more about the standard software installed on campus PCs.
They might have any arrangement of tables or desks and chairs for student use. Larger rooms may have more than one DVP to improve sightlines.
Specialized software will need to be requested in advance to the IT Service Desk.
BYOD Classrooms
BYOD rooms match a Standard Room set up but have additional outlets.
For additional tutorials, consult the videos below
Teaching Booths
There may be times where you’ve taught a class on campus, and have another class to deliver soon which is synchronously online. You may require a private room in which to teach this synchronous class. To meet this need, Conestoga has made Teaching Booths available.To book a teaching booth, browse the Room Finder in Outlook. Teaching booths are bookable much like any other physical rooms on campus. Choose the campus where you’ll need a room, and designated teaching booths will be shown. Select an available teaching booth and save your event to book the room. You’ll receive a confirmation email.
Classroom Podiums
Podium Controls
Room podiums use toggle controls. Push a button to turn these on or off. If the display does not appear, try changing the video source. Wait 5 seconds, then select the source you’d like to use again. This may help the display to reconnect.
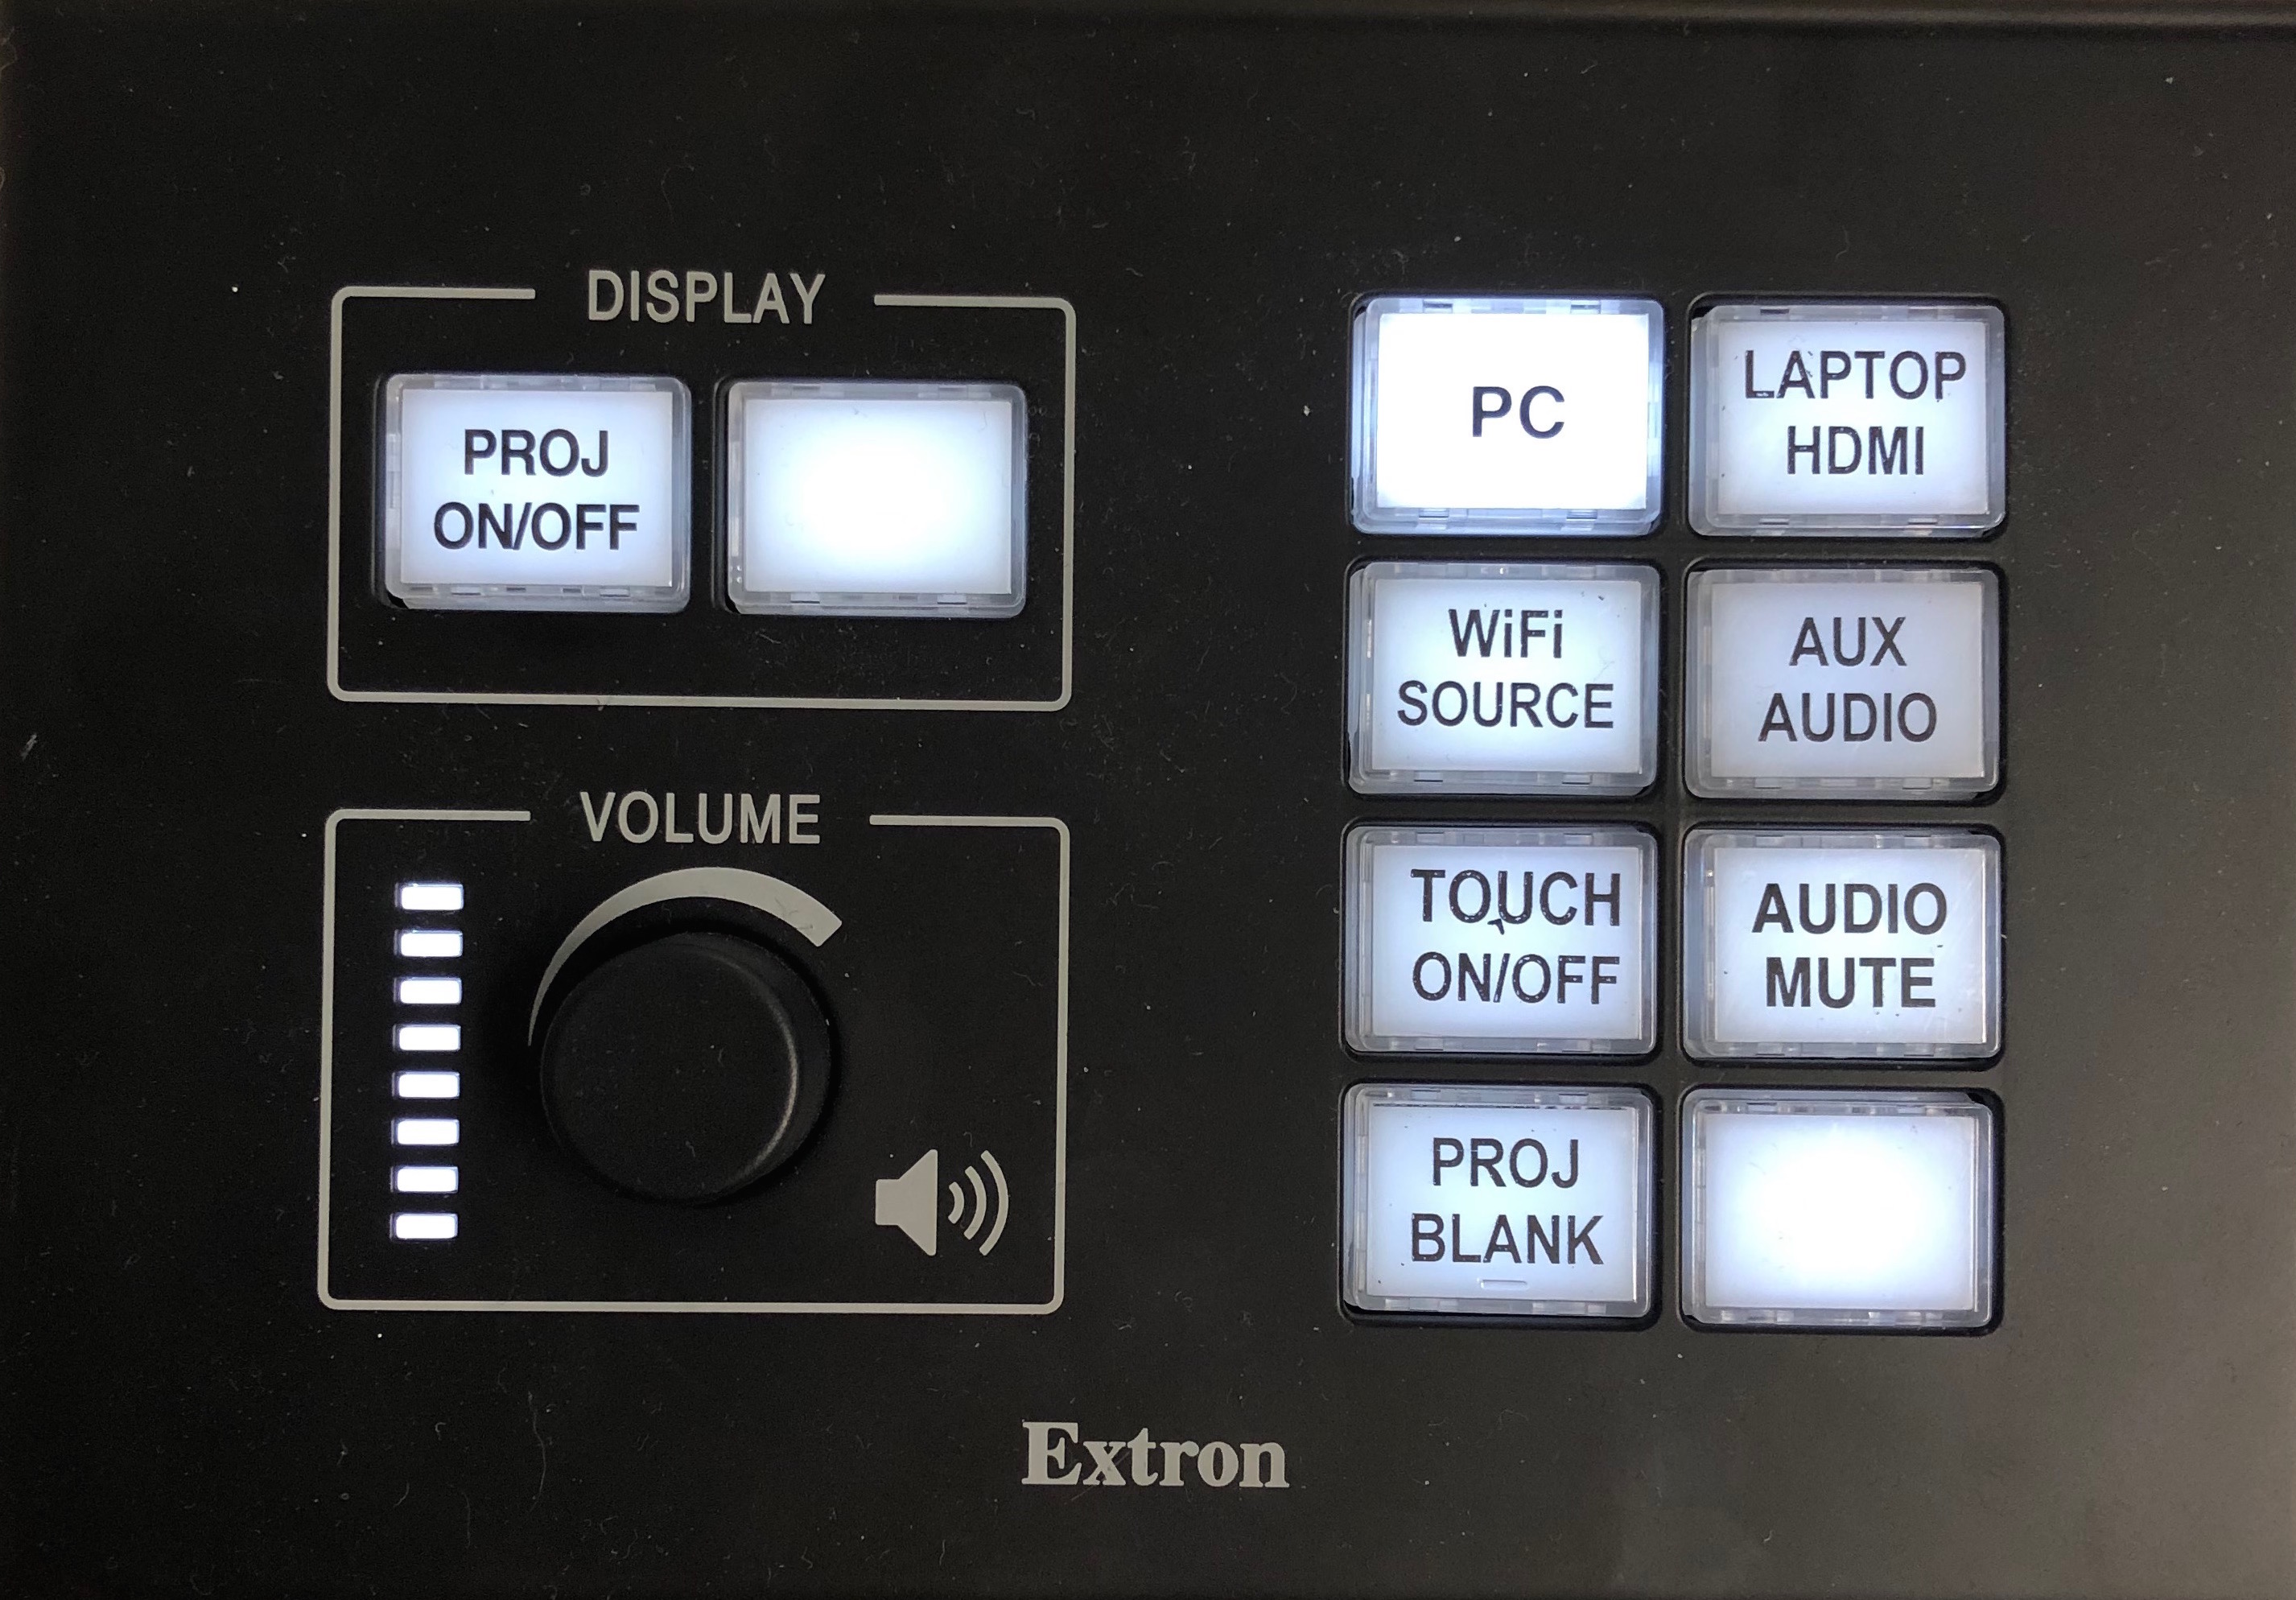
| Display On/Off | Turn this on first. The ON light will stop flashingwhen it is ready. |
| Touch On/Off | Rooms with interactive projectors have this option.Wait until the projector is fully started before turning the touch on. |
| Config | These buttons choose what type of device the projector is connected to. You can connect your laptop, wirelessly (using wi-fi source), or the PC in the room. |
| AV Mute | Press this to hide the display for your privacy. Press it again to show the display. The screen will read "AV Mute is ON". |
| Volume | Increase or decrease the volume of the room's speakers. Conduct an Audio Check before using the room's audio. |
Unique Podium Controls
The touch screen controls in DO-1D01, DO-2D01, DO-1D02, and DO-2D02 have similar functionality, but different operation than Standard Rooms. These are touch screen controls.
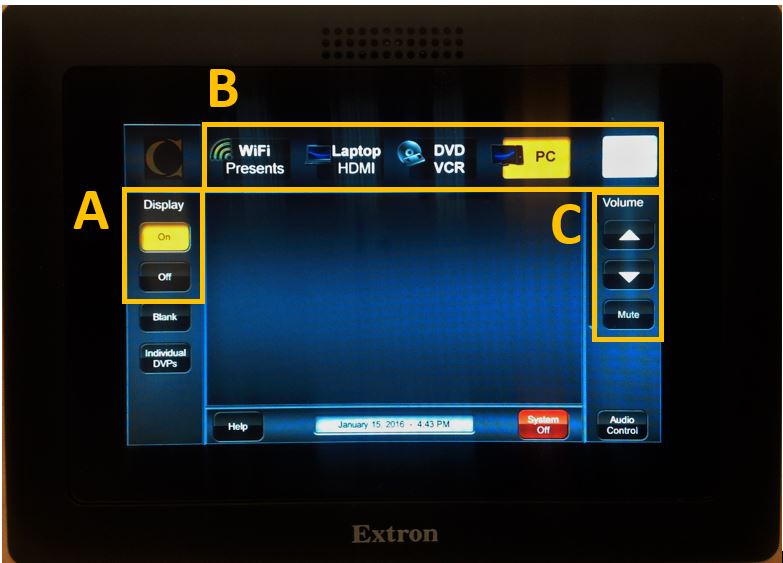
A. Display On/Off – Touch to turn Projector on or off.
B. Video Source Options - in order, from left to right.
- Wi-Fi Presents– Wireless Display (no software required).
- Laptop - HDMI only (you may require an adapter for your laptop).
- DVD/VCR - if available.
- PC
- AV Mute – if lit, your display and audio are not displayed, but still running.
C. Volume Control– Volume indicator will pop up, displaying the volume level. Adjust to suit.
Presenting video will work best from a wired connection.
Device Connections
You can choose to present the podium PC, or a laptop or mobile device from either a wired or wireless experience.
Display using the PC
You may prefer to use the Windows 10 PC in the classroom. This will also allow you to use the interactive projector. Learn more about using the interactive projector
Before presenting video, do an Audio Check.
If the display does not appear, try changing the source to Laptop. Wait 5 seconds, then select PC again. This may help the display to reconnect.
Display using the HDMI
You may prefer to connect your laptop or tablet using a wired, HDMI connection. You may need an adapter for your device.
Before presenting video, do an Audio Check.
If the display does not appear, try selecting changing the source to PC. Wait 5 seconds, then select Laptop again. This may help the display to reconnect.
Display Using the Wi-Fi Source
You might prefer to use a wireless connection for your laptop or tablet. This connection may lag if video or audio is presented. For laptops, download the EasyMP Network Projection software before using.
Select the Wi-Fi Source display source option on the podium. On the display screen, you will see instructions to connect a laptop or mobile device. Follow these instructions.
Classroom Audio
Conduct an Audio Check
Before running audio or video, complete a three-step audio check.
Using a Microphone in the Classroom
There may be some use cases where you imagine you may want to use a microphone in your teaching. This tip aims to provide options and solutions for a few different scenarios.
In each scenario, keep the following in mind.- If you’ve got a USB headset, you can use it. Classrooms don’t come equipped with Bluetooth, but there are USB ports on the front of the podium PC.
- If you’re using your own laptop, then you can use your personal Bluetooth headset. Just connect your laptop to the projector using the HDMI cable.
- If neither of these options work, you can request a mic from the Library. Instructions come with the set, but there is a limited number available.
Recording or Streaming a Class
It could be a unique occasion where a student is unable to come to class temporarily, and you want to either live stream or record a class. In this case, standard classrooms don’t come equipped with microphones, so you’d need some way of recording the audio.
In this situation, using a mic will provide better audio quality in the stream or recording. Connect your mic to the podium PC or your laptop, and do an audio check as you usually would.
Amplifying your Voice
If you’re looking for ways to amplify your voice, then you’ll need to use mics in a bit of a different context. This is another situation, however, where whatever mic you have available will work. In a class context where you need to amplify your voice, you’ll want to connect your mic, but have the audio coming through the speakers in the classroom.
Microphone Setup
Prepare the mic
- Install the batteries by flipping open the cover on the front

- Press and hold the power button until the screen turns on

-
Choose either the headset or clip on mic and plug it into the top of the transmitter

- AFTER you have logged into the computer plug the USB receiver into the USB port of the computer

Prepare Windows
- Open the Start Menu and search for “sound settings”, then select “sound settings”
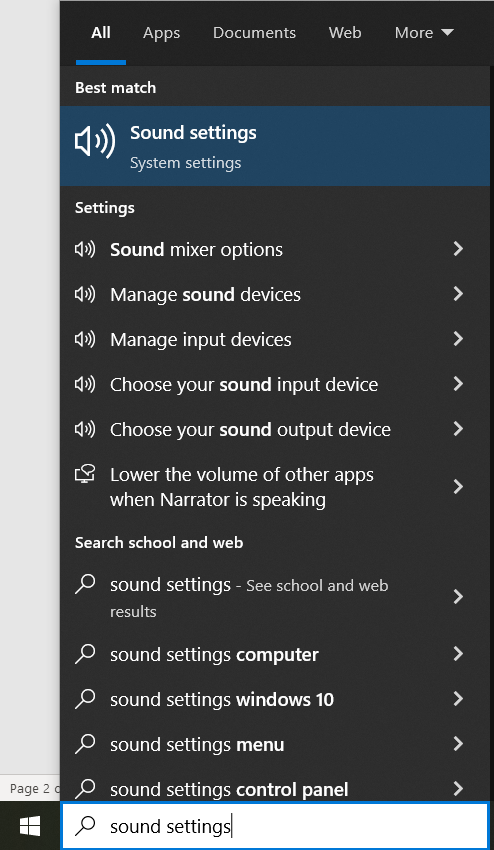
- On the window that pops up click on “sound control panel”

- On the window that pops up click the “recording” tab, then double click on the “microphone”

- On the window that pops up select the “listen” tab, then put a checkmark in the “listen to this device” box, then click “apply” and “ok” to the open windows to close them

- At the bottom right of the screen click the sound icon to bring up the audio outputs, NOTE: the outputs in the screenshot may not be the same as what you have

- While speaking into the mic, click through the various outputs until you hear your voice, depending how many outputs there are you may need to scroll up or down to see them all. NOTE: if after clicking through all the inputs if you don’t hear your voice, try spinning the volume knob on the A/V panel, then try clicking through the outputs again. If you still have no sound please contact IT Support at ext 4444
Classroom Lighting
Lighting Controls
Customize the lighting in your classroom by using the touch lighting panels.
Protect your privacy. In your device's Display options, choose whether to mirror or extend your display. Mirroring your display will show your desktop to your audience. Extending your display will create a secondary screen. Drag your software to the extended area to display it.
Interactive Projectors
Interactive Projectors
The interactive projector turns your screen into a tablet-like experience. It will be mounted closer to the main wall.
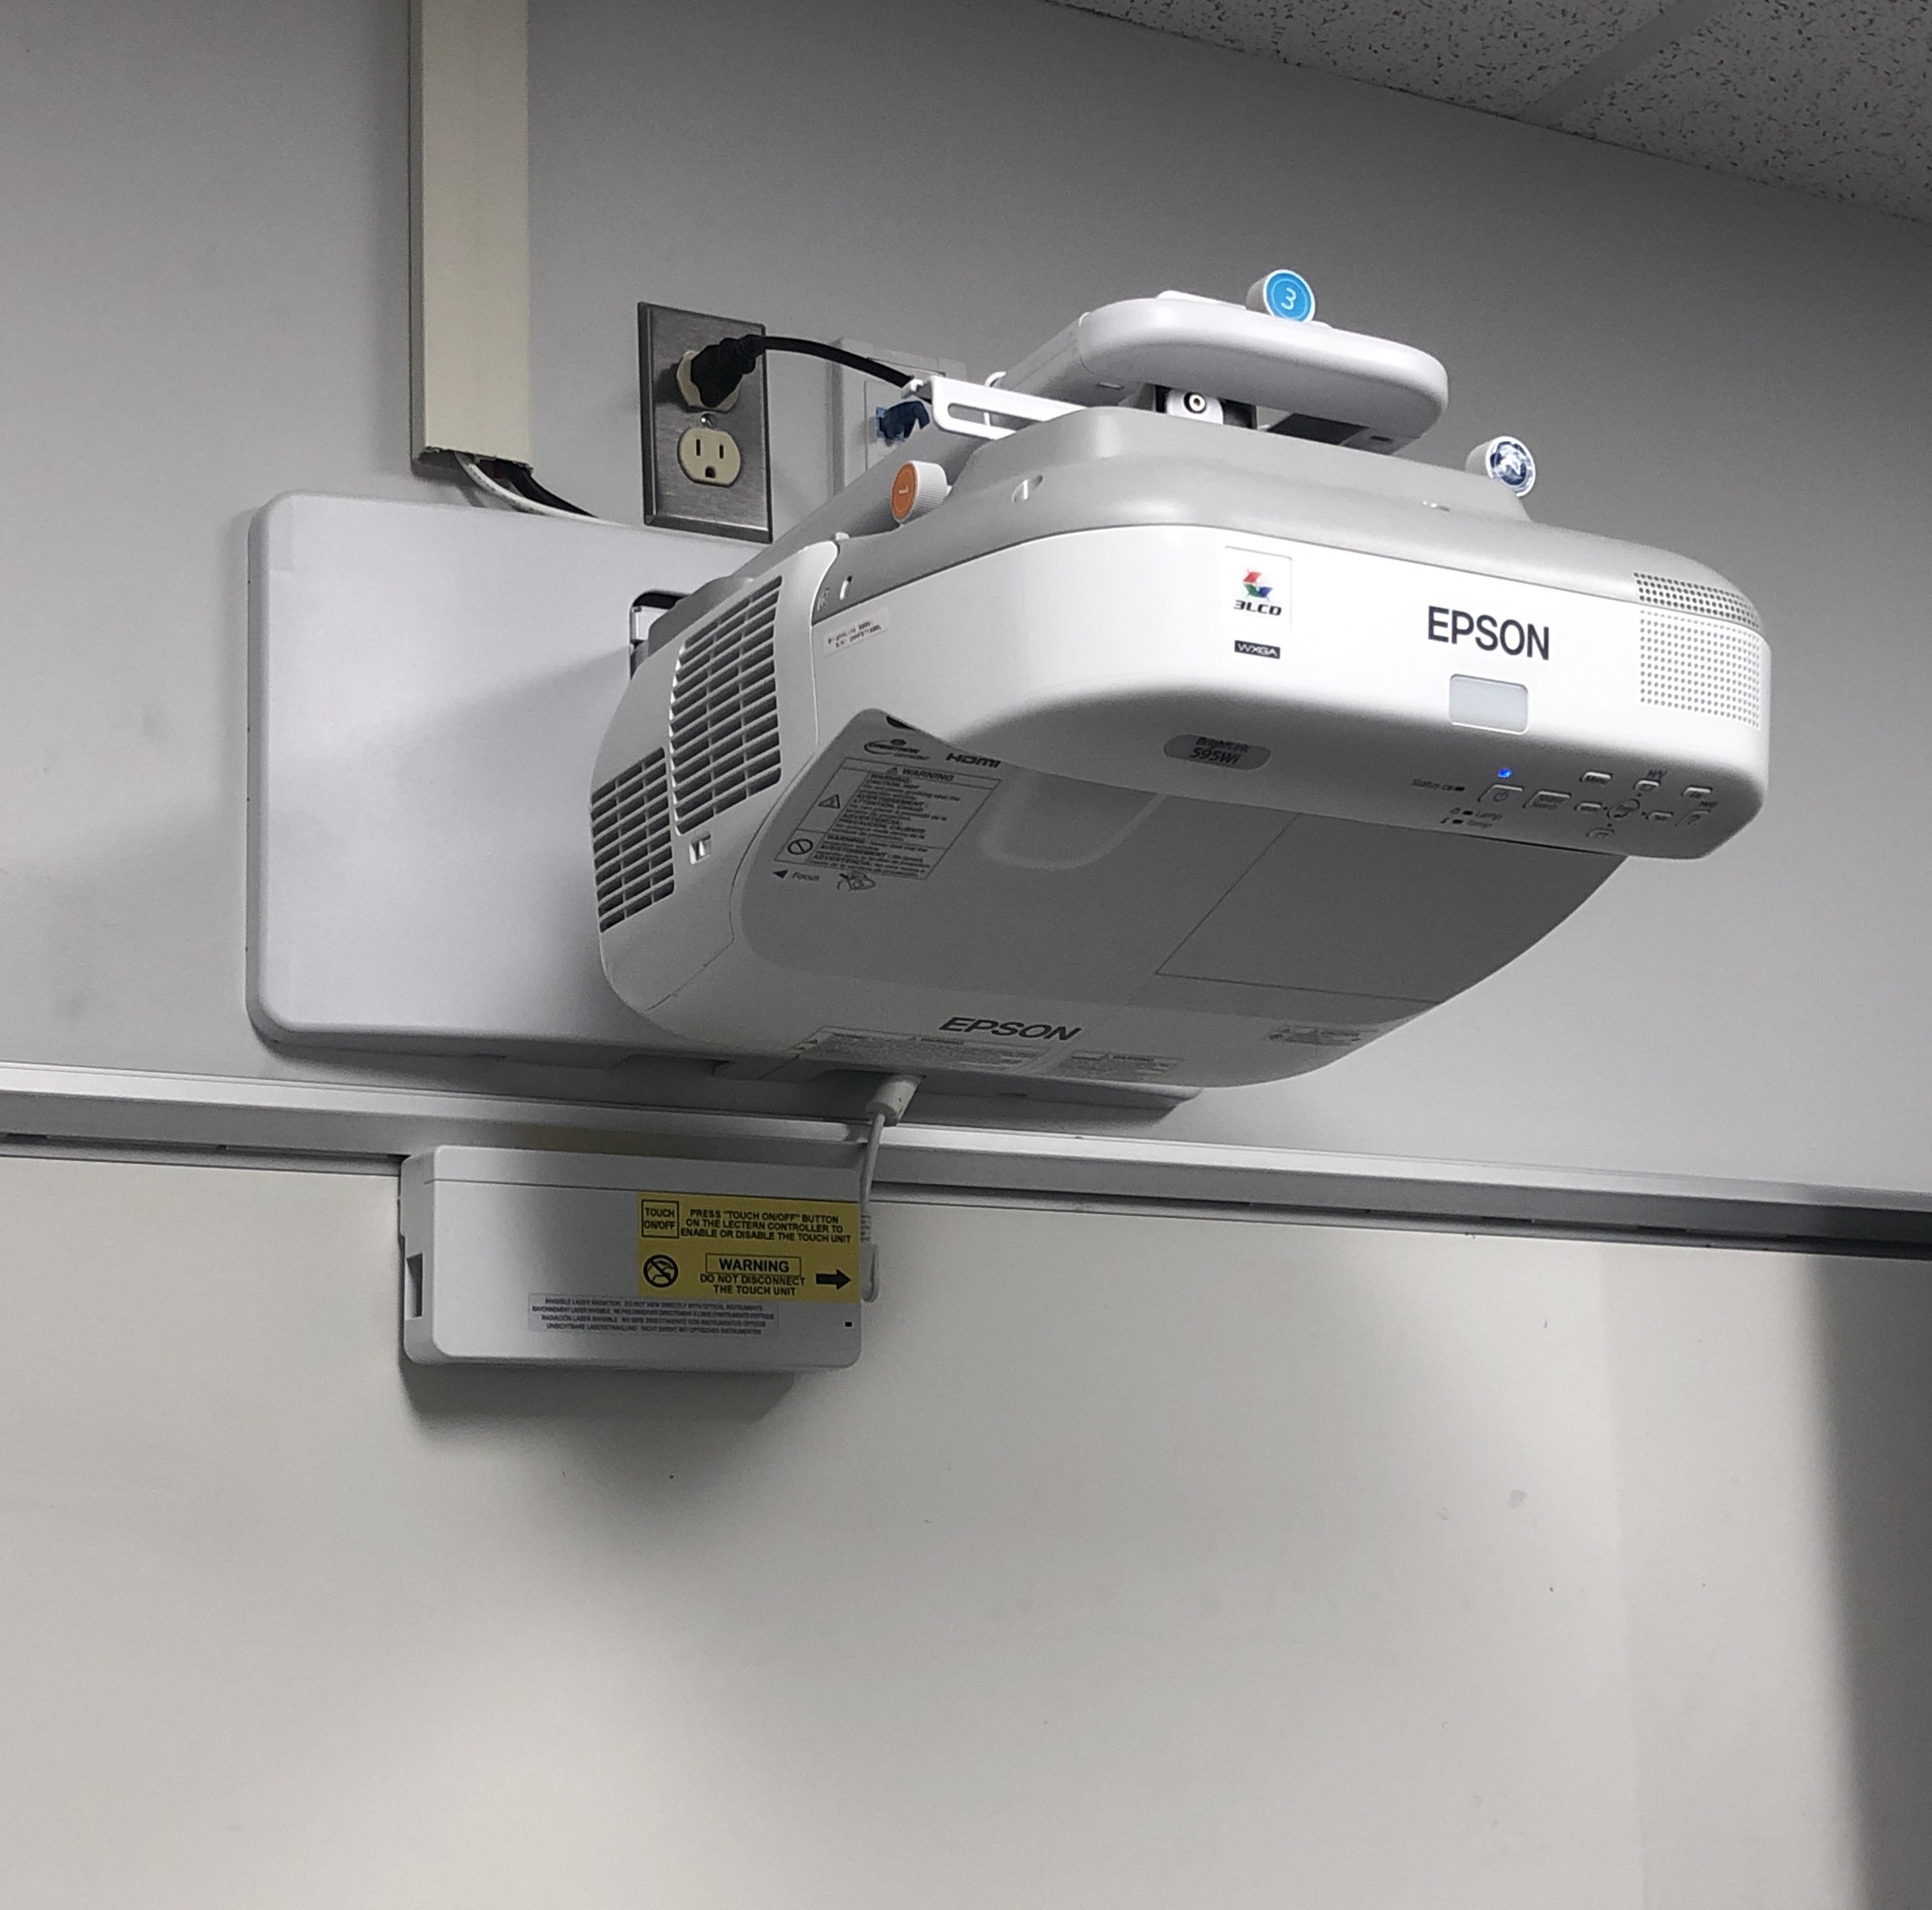
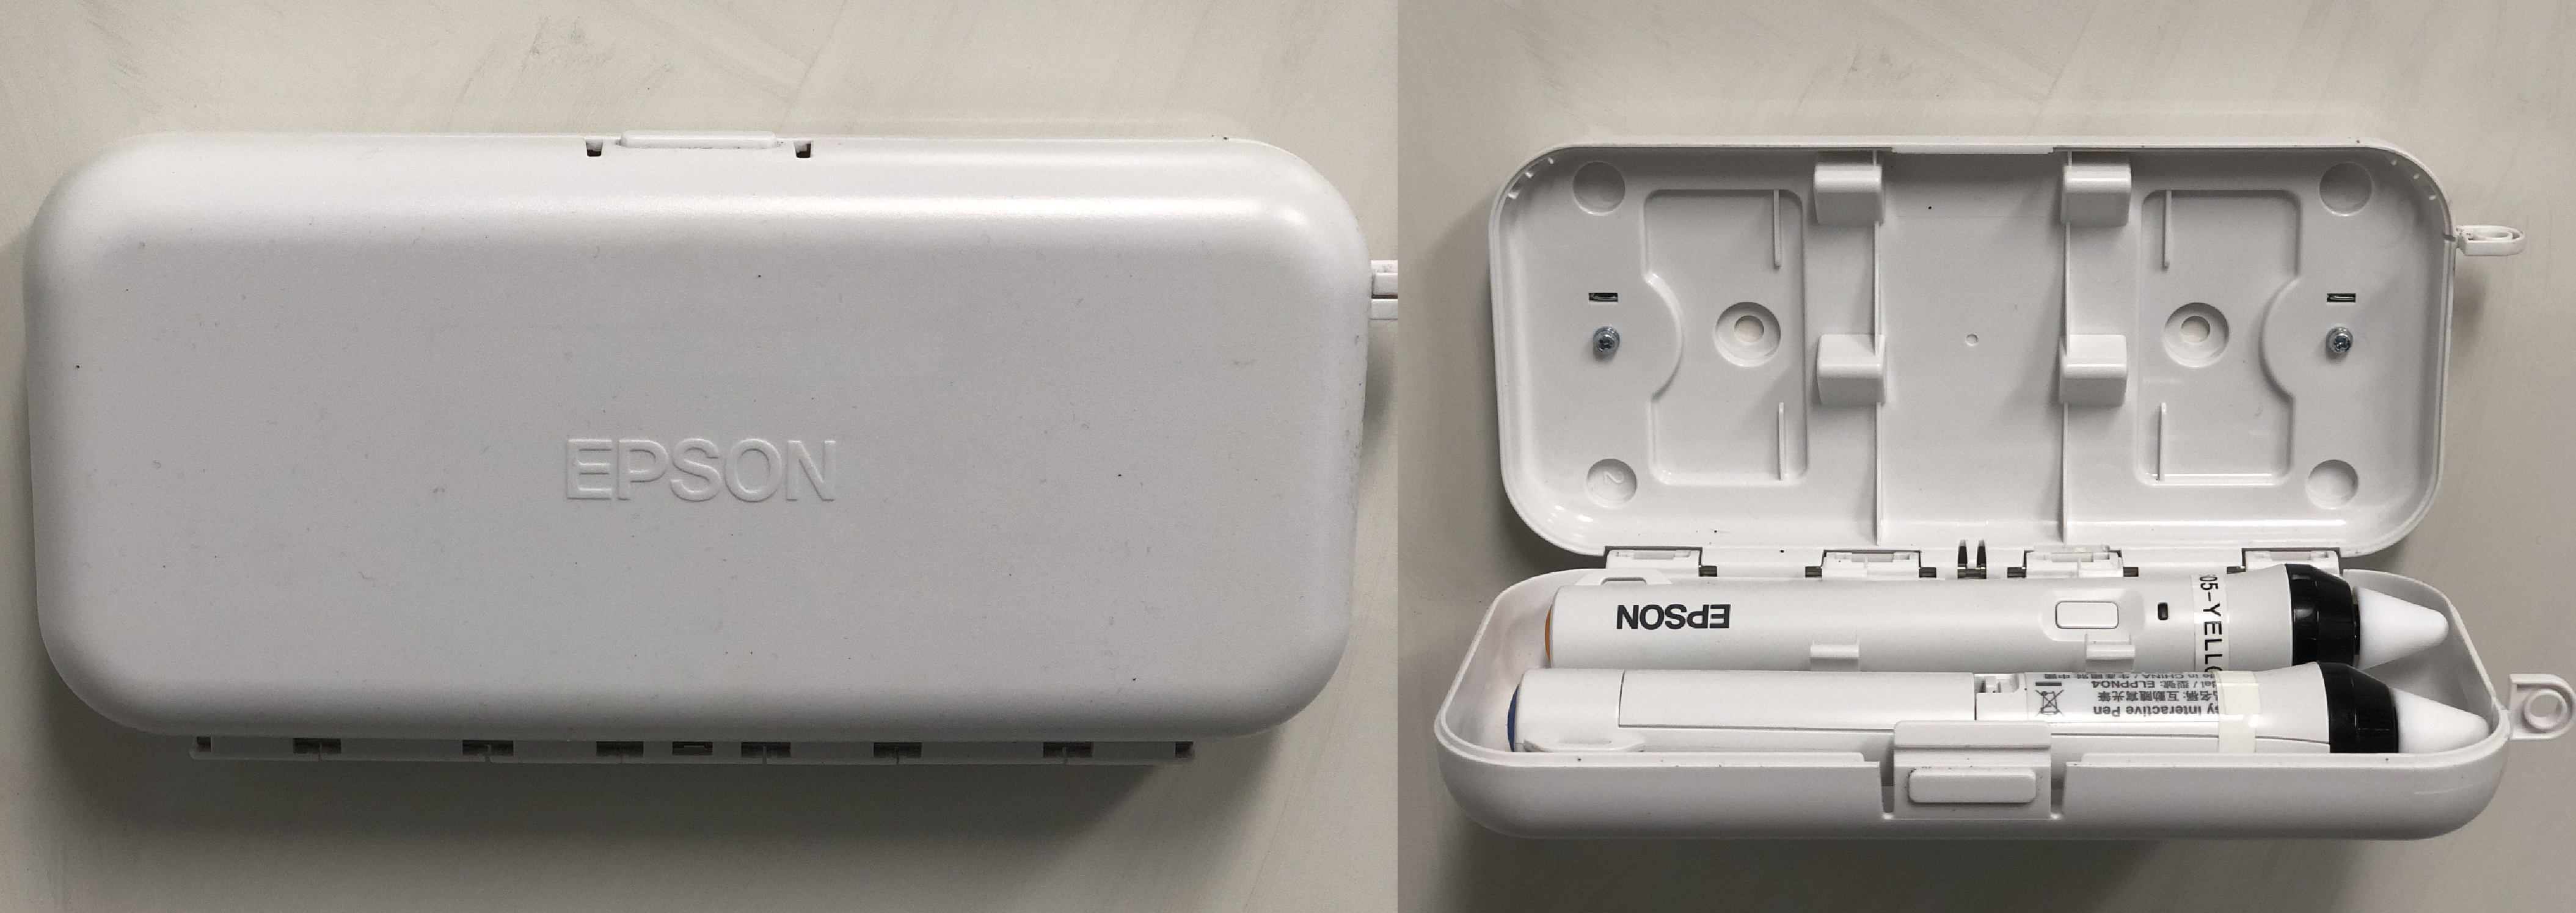
There will be two interactive pens, mounted either on the whiteboard or on the podium. Use these to interact with the projected screen. These pens use one AA battery - use the button on the pen to check if there is a charge - it should show a green light. If a pen does not work, inform IT Services by calling ext. 3444.
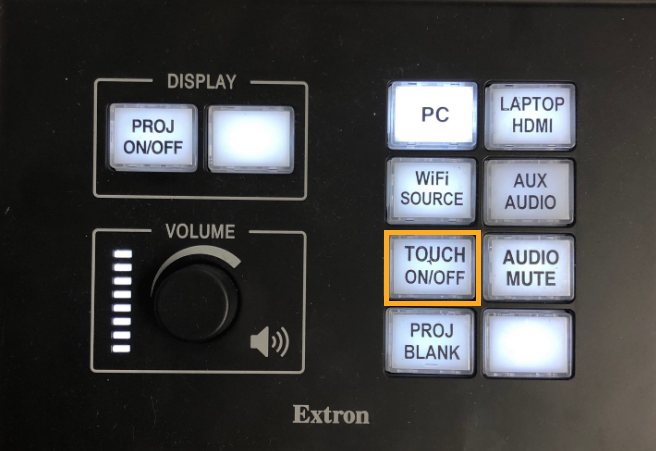
An interactive projector may also be touch interactive. Push the Touch On/Off button on the podium to enable the touch interaction. A blue light will appear on the interaction box, mounted on the whiteboard just below the projector, indicating you may now touch the board like a tablet.
Touch and interact with the projected screen as you would a tablet, using gestures to zoom, swipe, and using built-in digital inking features in Office software to annotate on presentations or documents.
View Software available in Classrooms or Labs
Employees can use the lab configuration page to view the hardware and software installed at any computer lab or classroom on campus. Specialized software should be requested in advance to the IT Service Desk.
Request Training on Classroom Technology
Contact Professional Developmentfor training on using this technology.
Need Help?
Contact the IT Service Desk, or call 519.748.5220 ext. 3444.